Monday, August 28, 2023

August Sewing Report


You can see by the beads of sweat on my arm that this month ended hot and steamy in my sewing room. My sewing room is non-air-conditioned, but if you've been around for any length of time, you all know that I relish the hot, hot days. I'm not complaining at all!

It has been a funny month weather wise. We had a week of cool weather that reminded us all that fall is around the corner. Then we had a week of hot and humid weather that made us all think we had been transported to the Everglades.

Anyway, I will start at the beginning......

One of my boys ripped my downy comforter. I really like this coverlet so I wanted to repair it posthaste.


The patch is not much to look at, but it counts as the first sewing project in August.

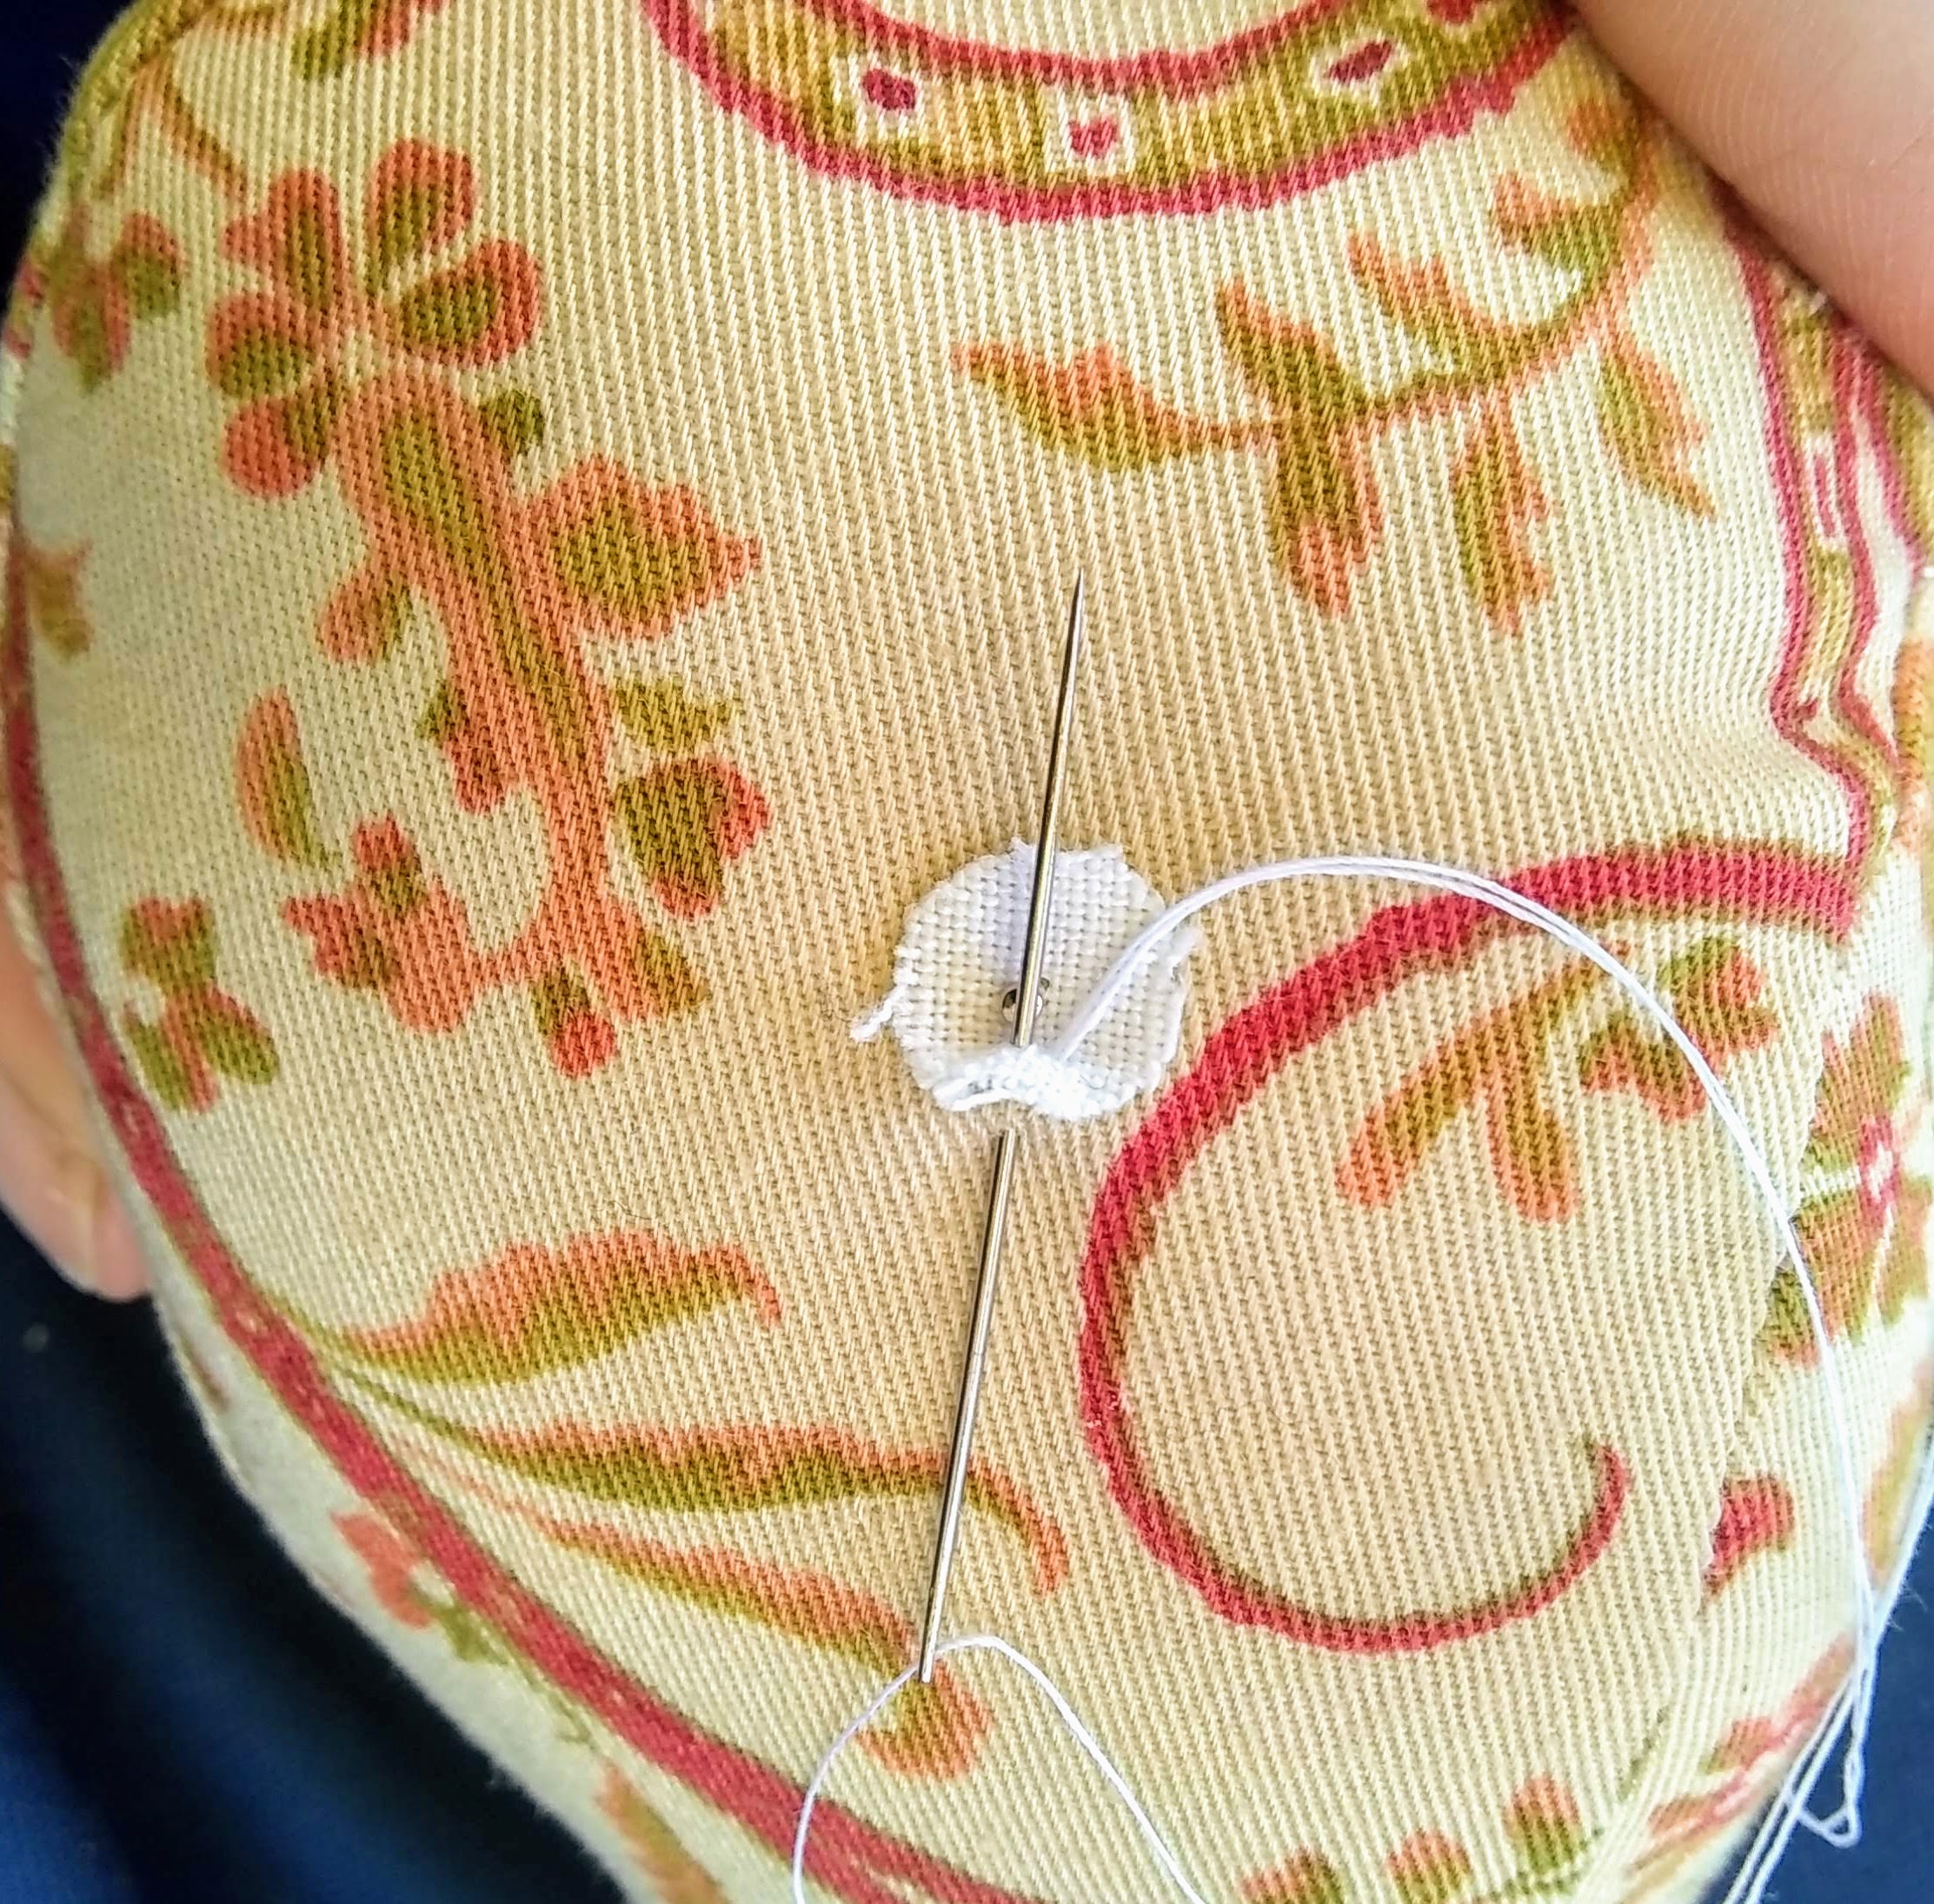
The next sewing project was a repair on a Christopher & Banks dress that I really like. I had split the side seam on the right side of the skirt.

The fabric was in pretty bad shape at the split. The stitches and pulled through the weave of the fabric as the two sides were pulled apart, leaving the fabric frayed and damaged.

I used some iron on adhesive webbing to glue new fabric to the back side of the dress fabric. Then I restitched the seam and stitched the patch in place with some matching thread. 

The thread blends in really well. I am happy with how this turned out. Hopefully, the other side will not split. I am a little worried about it.

The next sewing project that I accomplished was to finish a skirt that has been in my UFO pile for 5 years. All I had left to do was make and attach belt loops and hem the skirt. I was able to do both tasks in one afternoon! I'm glad to be done.

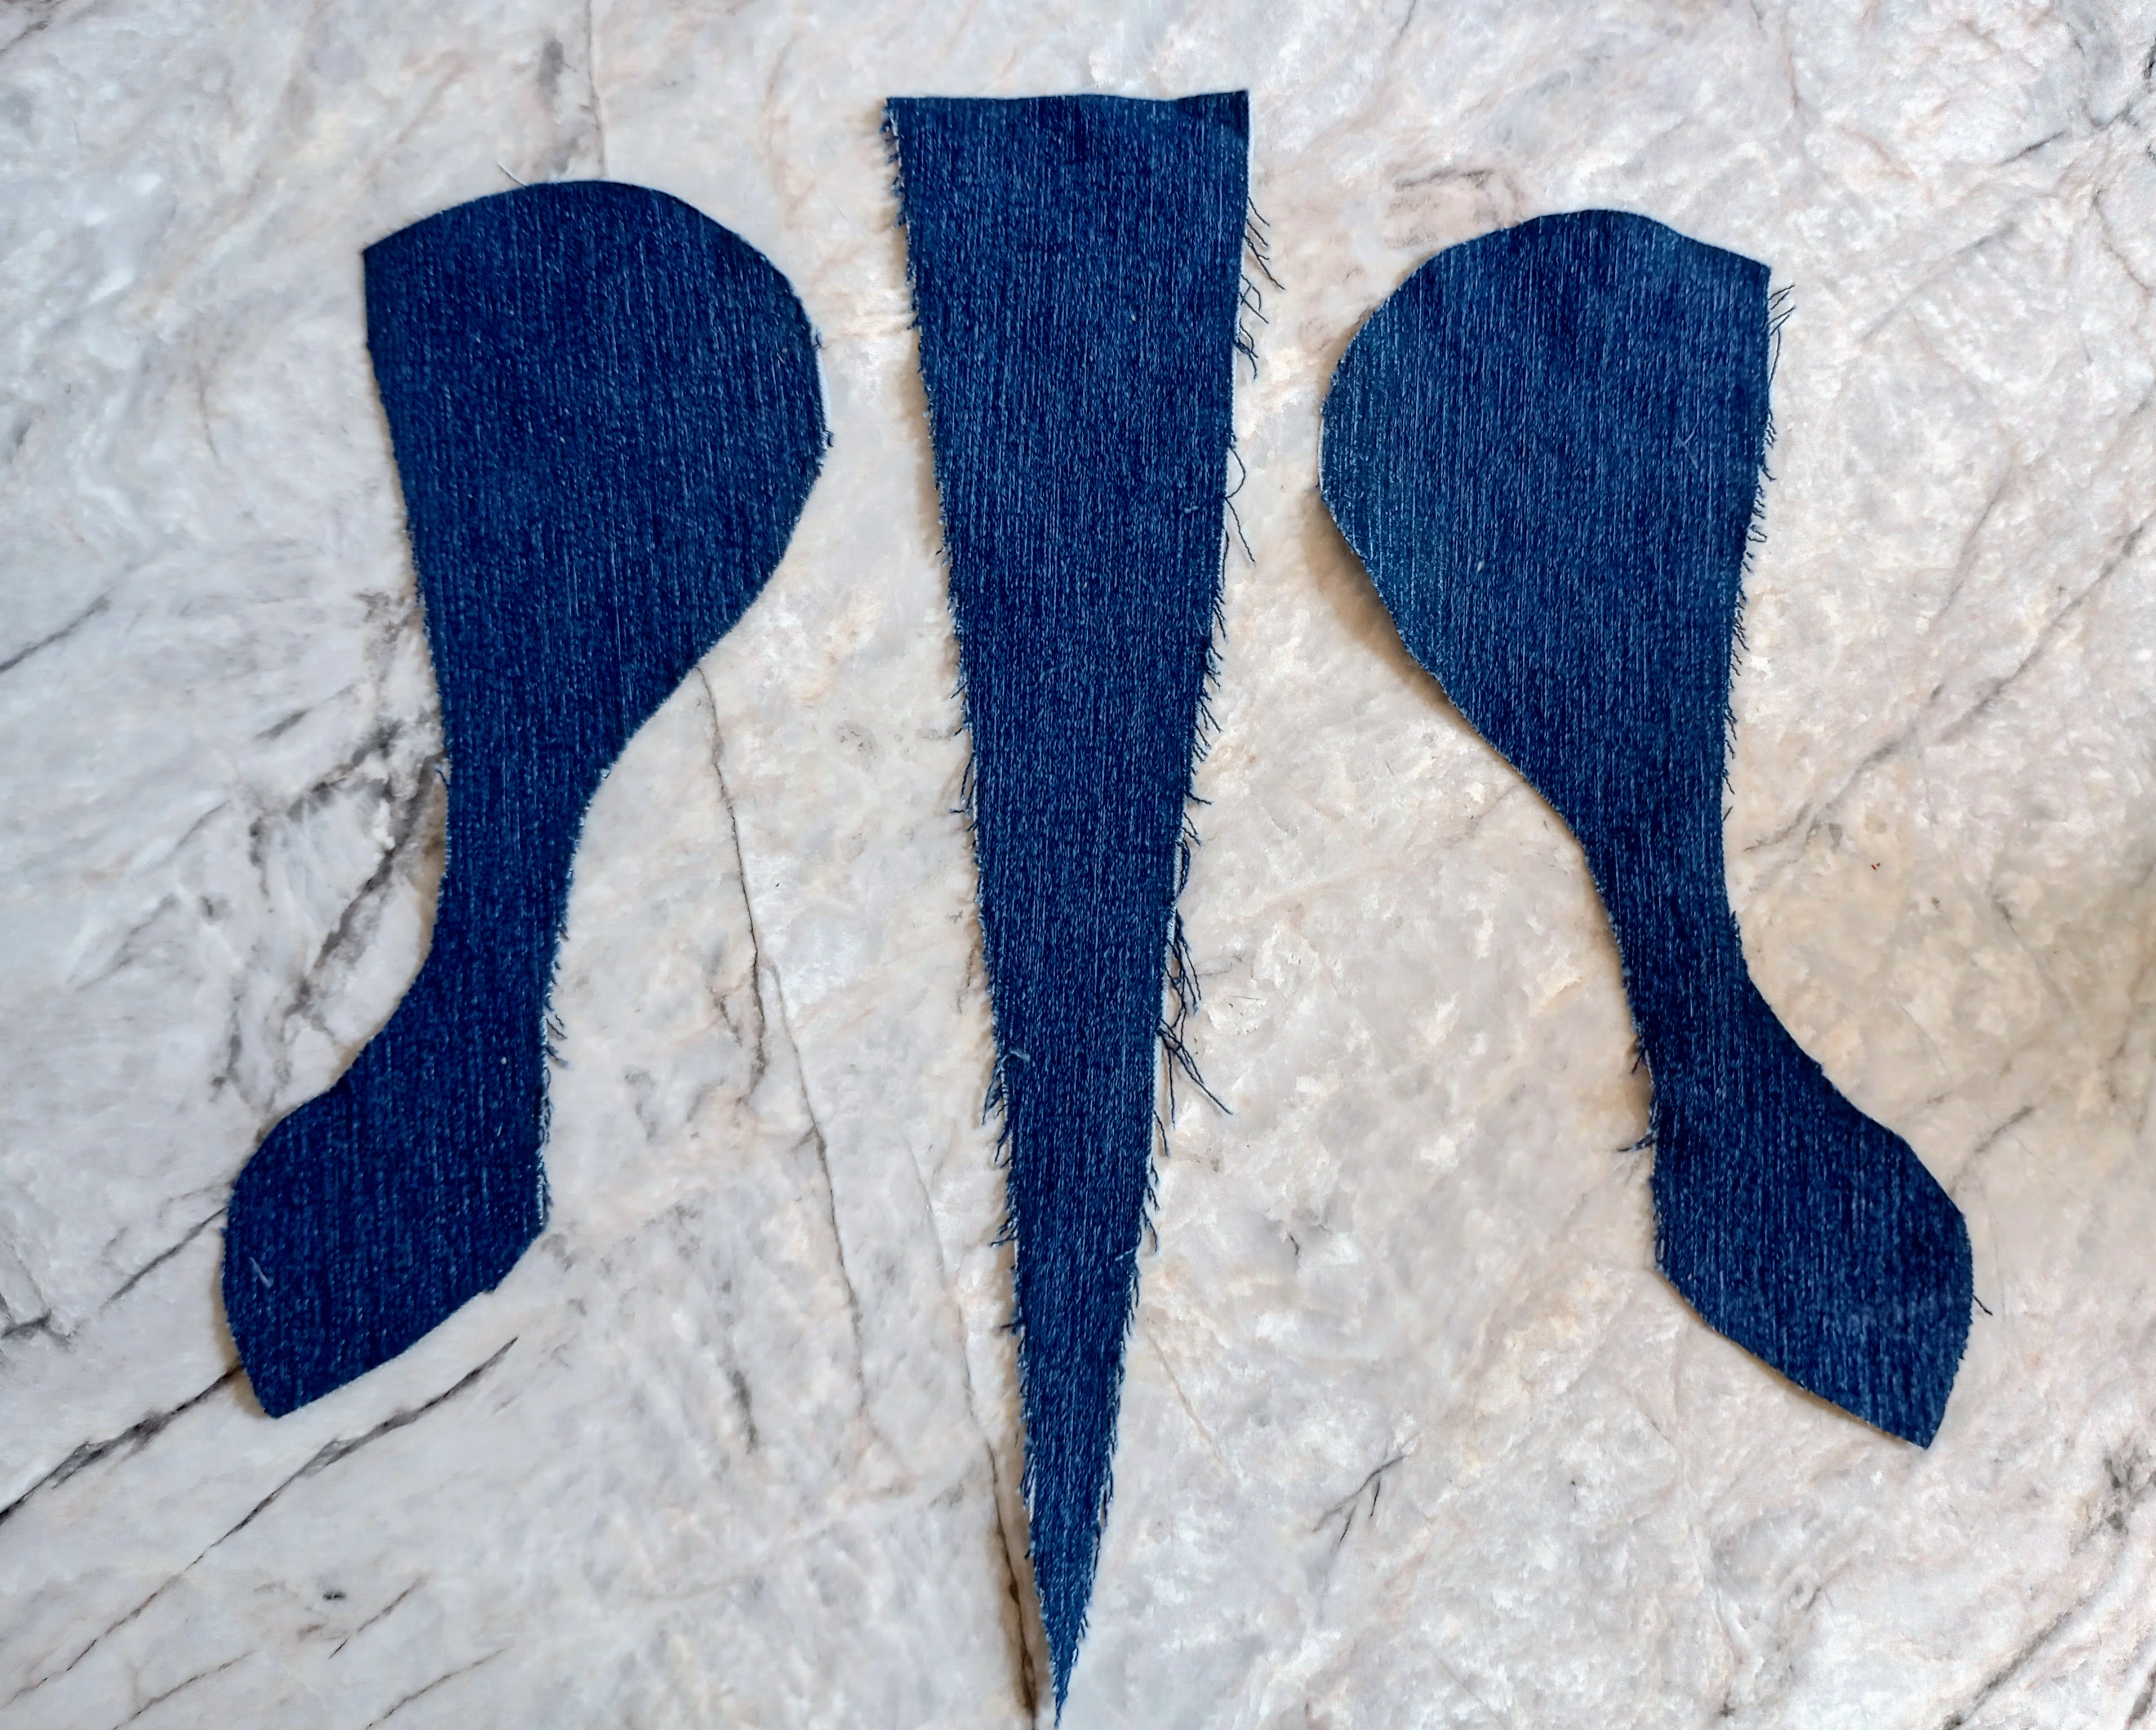
To form belt loops I cut a 2 inch strip of denim. (1.) I folded it in half length wise and pressed it. (2.) I opened it back up and the folded each edge towards the center. (3.) Fold the strip back down the center, this time encasing the raw edges.
I stitched two rows of stitching on the top surface. 
Then I cut the band to proper belt loop lengths.
Last I stitched the belt loops on to the skirt.

I decided to start sewing a dress for myself. I set to cutting out the pattern. This is a See & Sew pattern for a shirt dress that I found at a thrift store in PA. At the time that I found this pattern I was wanting a shirt dress really badly. I consider this pattern a particular gift from the Lord. I had been looking at shirt dress patterns and pattern reviews online trying to pick out the perfect pattern. And then this pattern came into my path for only 25¢. It has only one size in the envelope. Thankfully, it is a size that will fit on me.


Another nice thing is that this pattern had never been used before. I cut the pattern pieces and cut my fabric pieces.

I have finished the collar. This is a type of collar that I have never sewn before now. It came together nicely. It was nice to try something new.
This was the first time sewing a sleeve like this that has a tab to button when the sleeves are rolled up. I do like sleeves like this, so it is a nice feature of this pattern.

I have one more week before homeschooling starts. This is my chance to get this dress finished. After school starts there will be much less sewing progress to report. 
I'll see you again in September and let you know how it goes.

Monday, August 21, 2023

Stuffed Baby Whales Toy Tutorial Part 2: The Eyes

To sew the eyes:

I cut the eyes from a piece of tightly woven, white cotton. I use the back of a pen for a template.


I place the eye on the whale and use a pin to keep it in place.


I thread a needle a tie a secure knot at the end. I poke the needle into the whale a short distance from the eye. I am careful to put the point of the needle between the weft and warp of the weave.


Pull the needle up through the edge of the eye. And pull the knot through to the inside of the whale.


Make a small stitch around the edge of the eye and through the whale fabric.


Pull the stitch down to a small loop.


Using the tip of my needle I lay the stitch just where I want it as I pull the thread tight. 


Keep stitching around the edge of the eye.


Go all the way around.


And then stitch all the way around for a second time.


To tie my thread off, I tie a knot in the the thread.


I tie another knot right on top of the first knot.


I poke the tip of my needle, trying to place it between the weave. I have my needle come up a short distance from the eye.

I pull the knot through the hole, and down into the whale.


Clip the thread off. 

Next, the pupil of the eye has to be added.

I use a double threaded needle. I tie a knot and pull the knot to the inside of the whale.
I make the pupil with a padded satin stitch. Meaning; I make stitches in one direction and then stitch over top of the first stitches in the opposite direction.

To tie the thread off; I tie a single knot in the thread then poke the tip of my needle down, trying to place it between the weave of the eye fabric and the whale fabric beneath.

I put the needle up some distance away from the eye. I pull the knot through the fabrics. I help the knot go through by pushing down with the tip of my needle while keeping tension on the thread by pulling tightly with my fingers.

Clip the thread.

Tada! Finished!


Monday, August 14, 2023

Stuffed Baby Whale Toy Tutorial Part 1: The Body


I start by cutting the pieces out. I usually have some scraps or remnants. 


I use denim from jeans a lot of the time. 


It is fun to make the belly of the whales out of a contrasting printed fabric.


If I am not using a print material for the belly I will use the denim wrong side out.


Here are all the pieces for the upper whale laid out:

Step 1. With right sides together pin the center to one of the sides. Then stitch and zigzag the seam.

Step 2. Line up the other side to the center piece, pin, stitch, and zigzag.

Lining up the tail can be a little tricky. Make sure you fold open the first seam (from step 1.) Line the tail pieces up and pin in place. Pin it on the outside of the first seam. You want to be sure your stitching incompasses the first seam at the end of the pointed center piece so as not to leave any of the raw edge exposed.
You can check to see if your seam is deep enough by turning the tail over the second row of stitching should be a little wider seam that the first seam's stitching.

Step 3. Take the flipper pieces and pin them right sides together, stitch and clip curves. Flip right side out.
Step 5. Pin the flippers to the right side of the belly piece, baste.

Step 6. Zigzag stitch the raw edges of the belly piece and the upper assembly where the mouth opening will be. This will keep the edges from unraveling during the maneuvering of flipping the whale right side out and stuffing with polyfill.

Step 7. With right sides together, pin the belly piece to the upper assembly lining up the centers and tails. Stitch leaving and opening at the mouth, clip corners and zigzag to finish the raw edges.

Step 8. Turn whale right side out. A wooden skewer comes in handy with the corners of the tail.

Step 9. Stuff the whale with polyester filling. The wooden skewer is handy for this, too.

Step 10. Pin the opening closed.

Step 11. Using a ladder stitch, stitch the opening closed.


The body of the whale is done. All that remains is to sew on the eyes. 


Next week: How to sew on whale eyes.