Showing posts with label Etsy. Show all posts

Monday, August 14, 2023

Stuffed Baby Whale Toy Tutorial Part 1: The Body


I start by cutting the pieces out. I usually have some scraps or remnants. 


I use denim from jeans a lot of the time. 


It is fun to make the belly of the whales out of a contrasting printed fabric.


If I am not using a print material for the belly I will use the denim wrong side out.


Here are all the pieces for the upper whale laid out:
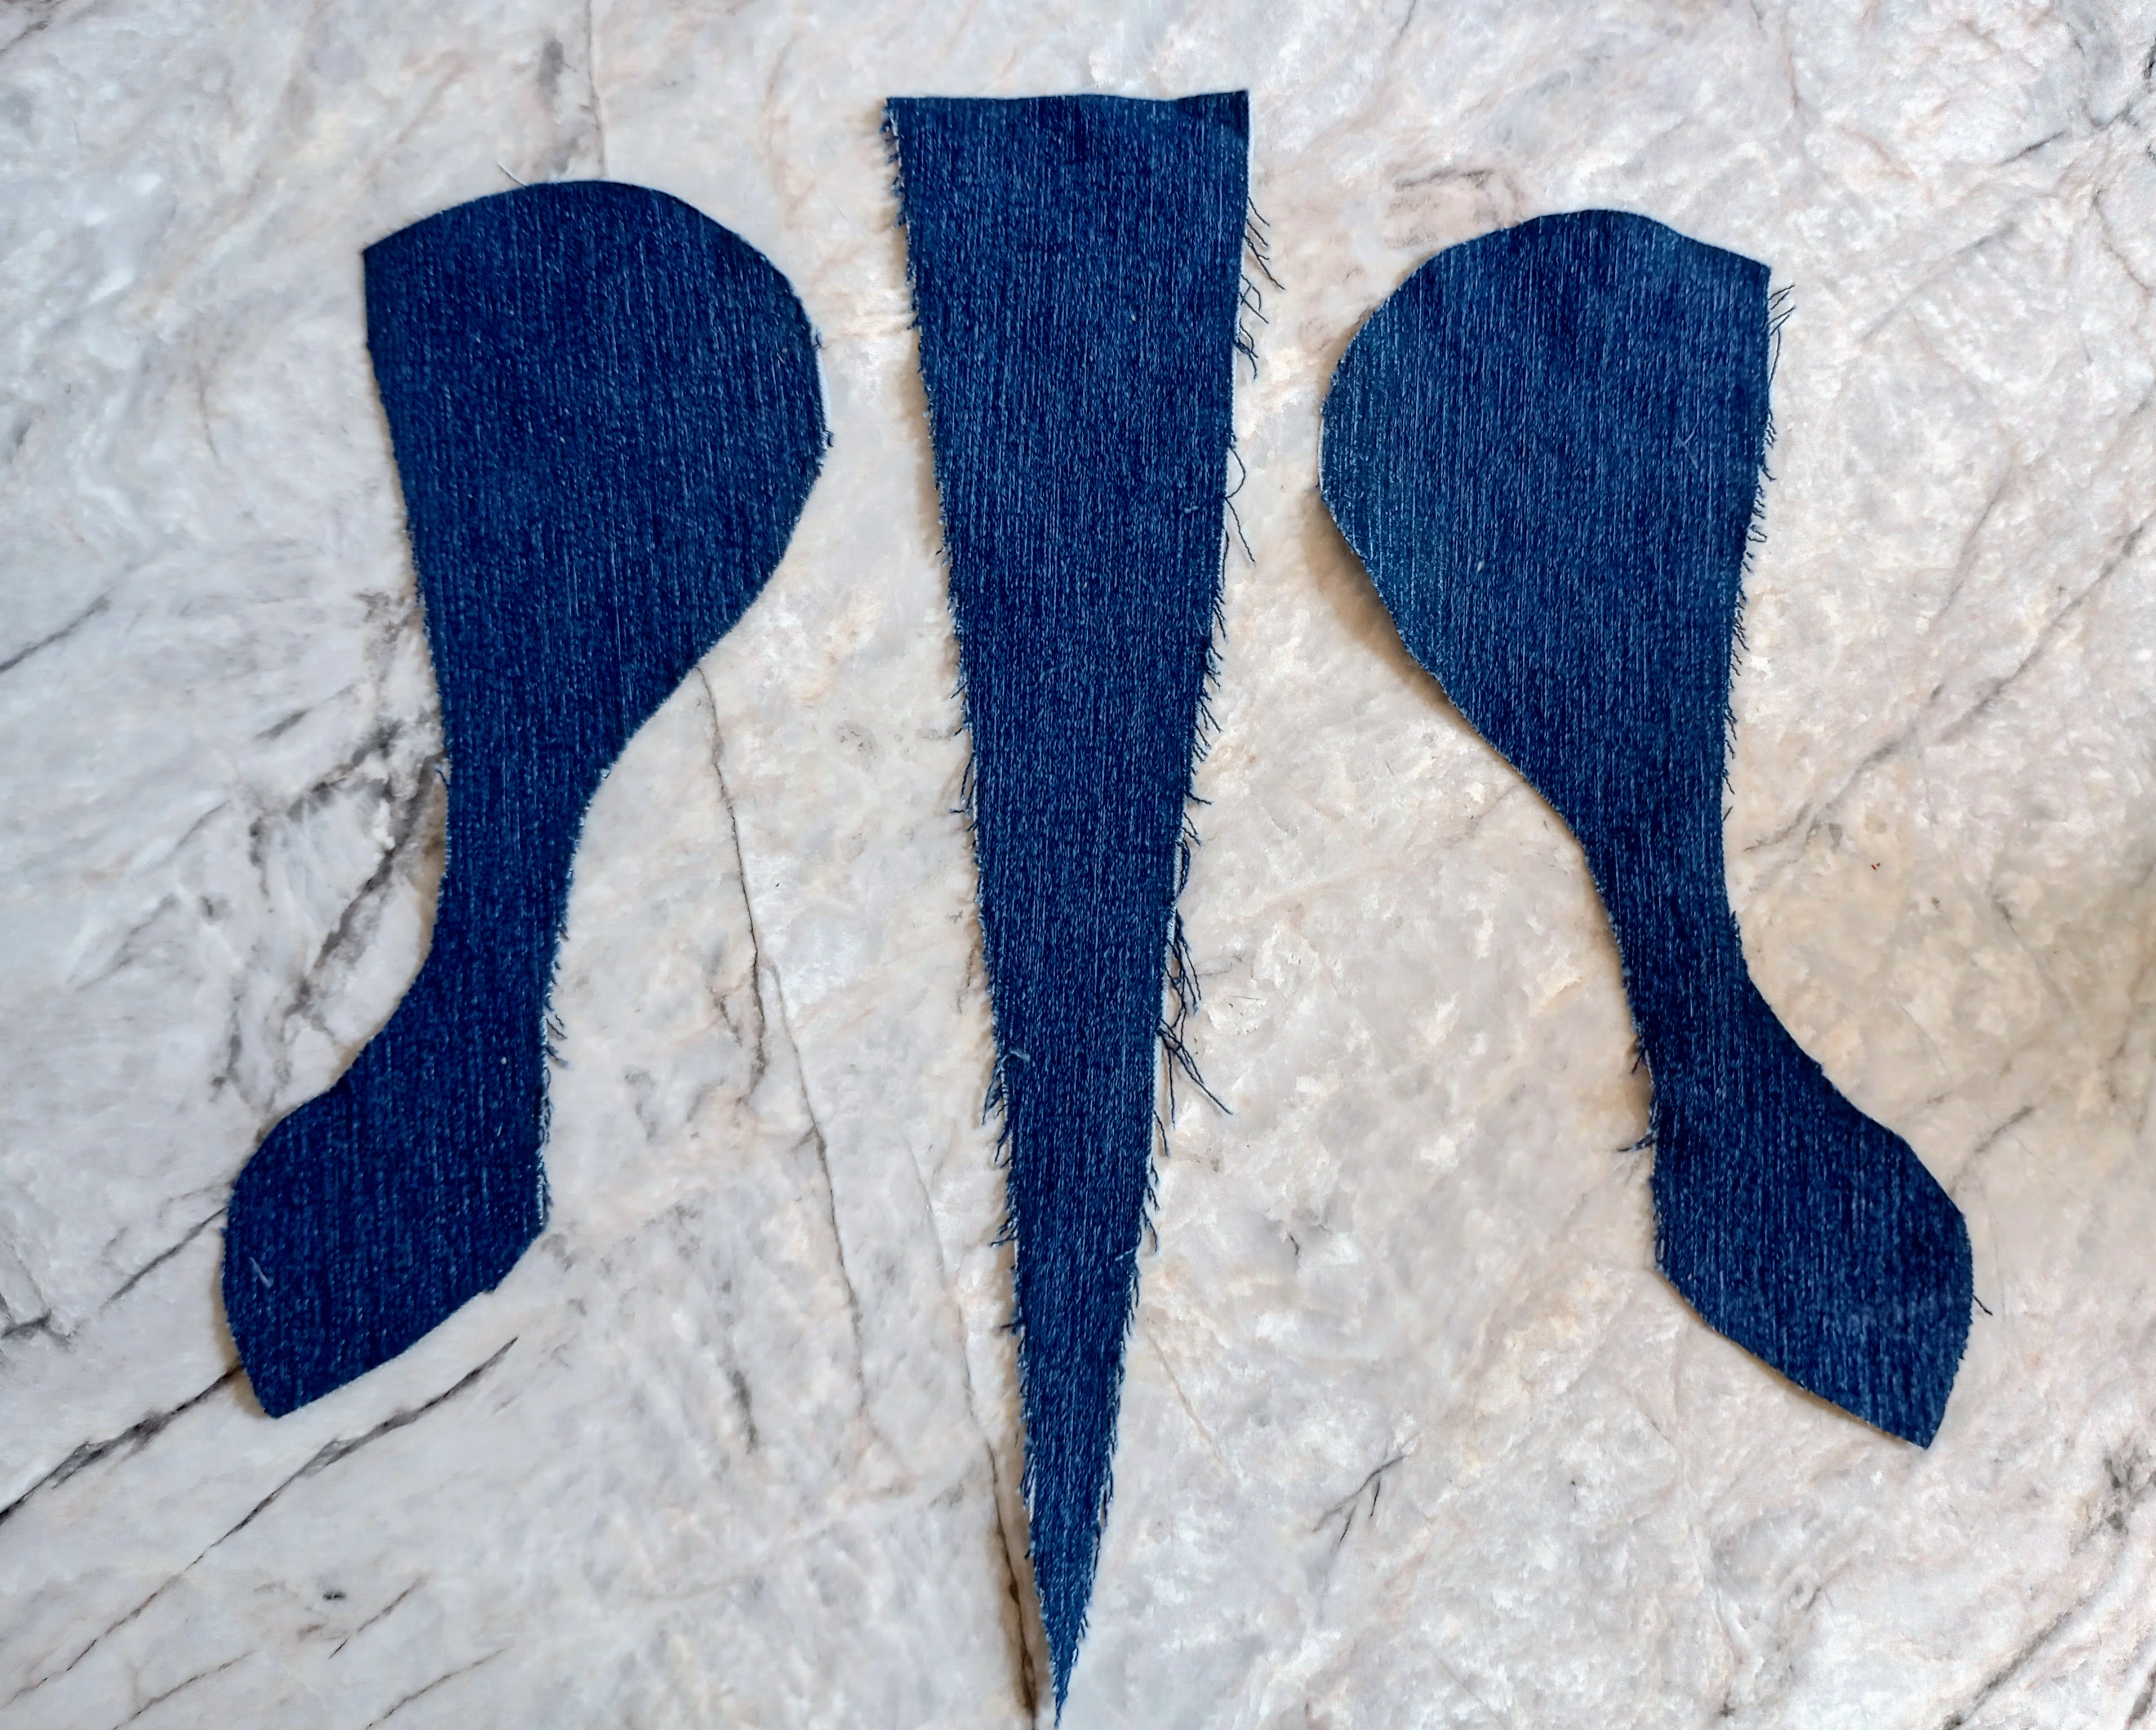
Step 1. With right sides together pin the center to one of the sides. Then stitch and zigzag the seam.

Step 2. Line up the other side to the center piece, pin, stitch, and zigzag.

Lining up the tail can be a little tricky. Make sure you fold open the first seam (from step 1.) Line the tail pieces up and pin in place. Pin it on the outside of the first seam. You want to be sure your stitching incompasses the first seam at the end of the pointed center piece so as not to leave any of the raw edge exposed.
You can check to see if your seam is deep enough by turning the tail over the second row of stitching should be a little wider seam that the first seam's stitching.

Step 3. Take the flipper pieces and pin them right sides together, stitch and clip curves. Flip right side out.
Step 5. Pin the flippers to the right side of the belly piece, baste.

Step 6. Zigzag stitch the raw edges of the belly piece and the upper assembly where the mouth opening will be. This will keep the edges from unraveling during the maneuvering of flipping the whale right side out and stuffing with polyfill.

Step 7. With right sides together, pin the belly piece to the upper assembly lining up the centers and tails. Stitch leaving and opening at the mouth, clip corners and zigzag to finish the raw edges.

Step 8. Turn whale right side out. A wooden skewer comes in handy with the corners of the tail.

Step 9. Stuff the whale with polyester filling. The wooden skewer is handy for this, too.

Step 10. Pin the opening closed.

Step 11. Using a ladder stitch, stitch the opening closed.


The body of the whale is done. All that remains is to sew on the eyes. 


Next week: How to sew on whale eyes.


Monday, April 3, 2023

The Girl's Have Dresses Finally!


It took me a while. I didn't finish these dresses in February. I barely finished them in March.

My 20 minutes of sewing a day program gets pushed to the wayside more often than not. I did finish a sewing project in February. What I did was sew buttons onto a shirt that I made for Mr. In The Mid-west years ago. 

This shirt has been sitting in a pile of unfinished sewing projects for over SEVEN YEARS! A long time ago I made matching shirts for myself and Mr. In The Mid-west. But Mr. In The Mid-west never got to wear his because I didn't have enough matching buttons for both shirts. I put the buttons that I did have on my shirt. I wore my shirt out. It was stained and faded. In February I took all the buttons off of my shirt and sewed them onto Mr. In The Mid-west's shirt. It was my Valentine's gift for him this year. I was so happy to see him wearing the shirt I made for him with my own hands. He liked it and even wore it to Church!
 As the month of March drew to a close I began to cram. The last days of March saw me sewing much more than 20 minutes a day. I was determined to finish the doll dresses before April came.
As the dresses got closer to completion it became harder to put them down. I didn't want to quit sewing. I was so close to being able to put the dresses on the dolls!

I finished the last stitches. The final touch was to put the snap buttons on the back. 
The following morning my daughter helped me by posing with the dolls for my Etsy listing. She loves every doll I make. I feel a little bad selling them. She does have her own doll that I made for her a couple years ago, besides the multiple store bought dolls she has. A girl can never have too many doll, I guess! 


Thursday, August 25, 2022

Onion Pack For Congestion


I had to make onion packs this week for my sick baby. This is an old home remedy for congestion. It helps break up the congestion and get the phlegm moving.
When I was a new mom I was at a loss for coming up with a way to put this on a person. I tried putting the onion on the skin and wrapping a scarf around the chest. It didn't work.
This works:
Dice about a 1/4 cup onion and place in the middle of a flannel rag or cloth napkin. Sprinkle with ground mustard. 
Go easy with the mustard it can be irritating on the skin. Ask me how I know....

Fold the napkin strategically encasing the onions.
I fold it so that one side of the pocket is only one layer of fabric thick. You can see how the onion juice easily soaks through on that side. 

I place the thin side against the skin and then safety pin the pack to the inside of the patient's shirt.
Make sure when you safety pin the pack on, that you go through all the layers of the pack that way it will stay neatly folded and doesn't spill onions everywhere.

I also had to mix up some garlic infused oil for earaches. This is my favorite remedy for earaches.

I mix about 1 TBS. Olive Oil with 1 freshly grated garlic clove. I put one to two drops of this garlic infused oil down the ear 4-6 times a day. Wiggle the ear a little to make sure the oil goes all the way down. You can use a small piece of a cotton ball or wadded up bath tissue to plug the ear and keep the oil from running out and staining pillow cases.

Lavender essential oil (diluted in a carrier) wiped on the outside of the ear hole has been very soothing, in my experience. I don't recommend that essential oils be put into the ear canal. Keep the essential oils on the outside!

I like to use a blend of Laurel Leaf, Eucalyptus, Peppermint, Melaleuca, Lemon, Cardamom Seed, Ravintsara, and Ravensara essential oils, also, wiped on the outside of the ear hole. This helps take the edge off of the pain. I use the dōTERRA Breath® blend (diluted in a carrier). 

There is a cool company that sells knock off Young Living and dōTERRA blends. HERE IS A LINK. I have never tried them or done a side by side comparisons. But, I am sharing their site because they are much cheaper. And, I am not an essential oil cult member, even if I am a dōTERRA consultant. ;)


I hope you are all staying well! Let me know if you have any tried and true congestion and earache home remedies! :)

Friday, May 20, 2022

Doll Hair Tutorial With Yarn

 
Of course a Doll can't grow hair, but have you ever wondered how a Rag Doll goes from this..........

to this,.......?
In this blog post I will share how I give my Rag Dolls a full head of hair. 
(IF you are interested in purchasing my Rag Dolls or my Rag Doll pattern visit QuietStandards on Etsy.)
Back to the tutorial.
The supplies are:
Thread 
Needle
Thimble
A whole bunch of yarn strings cut to 12-14 inches long

Use a pencil to draw a line down the middle of the back of the doll's head.
Carry this line over to the front of the doll's head.
Take a strand of yarn and fold it in half.
Stitch the center of the piece of yarn to the doll's head, using the pencil line as a stitching guide.
Loop your thread around the center of the yarn.
Use your needle to stitch down into the doll head at the back side of the yarn and bring your needle up a few millimeters out in front of the yarn, setting up for the next piece of yarn.
And then loop the next stitch back over another piece of yarn and so on and so forth....
Keep going.
When you have stitched the last piece of yarn onto the doll's head, tie off the thread in an inconspicuous area of the head where the knot will not be visible once the hair is braided.

Tie the hair into ponytails using a length of thread or yarn.
Tack the ponytails to the sides of the doll's head with a couple stitches that go around the thread or yarn tying the ponytails and back through the fabric of the head.
Carefully braid the ponytails and tie off with thread or yarn.

Use scissors to trim the long ends, leaving as much tassel as you like.
 
Even up all the ends, making all the strands the same length.

And that concludes this tutorial. If you have any questions, please send me a message or leave a comment!