Tuesday, November 23, 2021

Vintage Waffle Makers

Vintage waffle makers have a special appeal to me. My mom used a 1950's or 60's General Electric model all through out my childhood. In fact, she still uses it. The family out grew one waffle maker and, fortunately, she was able to pick up another General Electric waffle maker of the same model. Now she uses both waffle makers to cook enough waffles to feed everyone.

We were gifted a modern waffle maker as a wedding present. It worked well for four years before it conked out, which was very nice. But, it did not stand up to anywhere near the amount of time or use that my Mom's vintage waffle makers have.

I was excited when I recently acquired three vintage waffle makers. There is a thrift store in our area that has turned out to be a good place to look for vintage waffle makers.

My family is not big enough to require three waffle makers to feed everyone. And, I have no intention of starting a vintage waffle maker collection. (The more I learn about these old appliances, though, the more I am tempted.....)

I made a plan to try them all out and keep the one that I liked the best.
As I expected, the first couple batches stuck badly to the waffle griddles. What a pain!

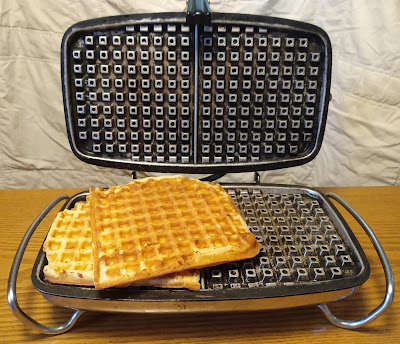
The oldest waffle maker that I tested was the Fostoria by McGraw Electric Co. 

I fell into a deep internet rabbit hole reading all I could about the McGraw Electric Company. The long and short of it is, that a fascinating gentleman, Max McGraw, started his electric company in 1900 when he was only 17. He had good business sense. He was able to expanded his company in many directions. In 1948 he bought the Fostoria brand. The waffle maker I have was manufactured between 1953 and 1957.
The waffle griddles are made from cast aluminum. They are not coated with any non-stick finishes. The griddles become seasoned with use and end up behaving like a they have a non-stick surface. Just like cast iron does once it has been seasoned.

The Fostoria waffle maker is not temperature regulated. It does have a temperature indicator. To keep it at the right temperature for baking waffles you have to manually regulate the temperature by unplugging the appliance when it starts to get too hot and plugging it back in when it starts to get cool. I didn't have any trouble keeping it at the right temperature.
The Fostoria waffle maker is the only one with a fabric covered cord 
Further reading:


The newest waffle maker I tested was a General Electric model A2G48T. I don't know when it was made. One indicator of it being a newer appliance is the heating elements. They are not the coiled spring heating elements of earlier times.

The A2G48T made the regular style waffles with small dimples and not the larger hole Belgium style waffles.


This waffle maker has a very shiny chrome finish.

I saved the best for last........
This Sunbeam no. WB-K is the winner in my kitchen!

The waffles are rectangular. They come out nice and crispy on the edges. They have American style dimples. The waffle maker is hefty and well built. It heats up quickly and the temperature is self regulated. 
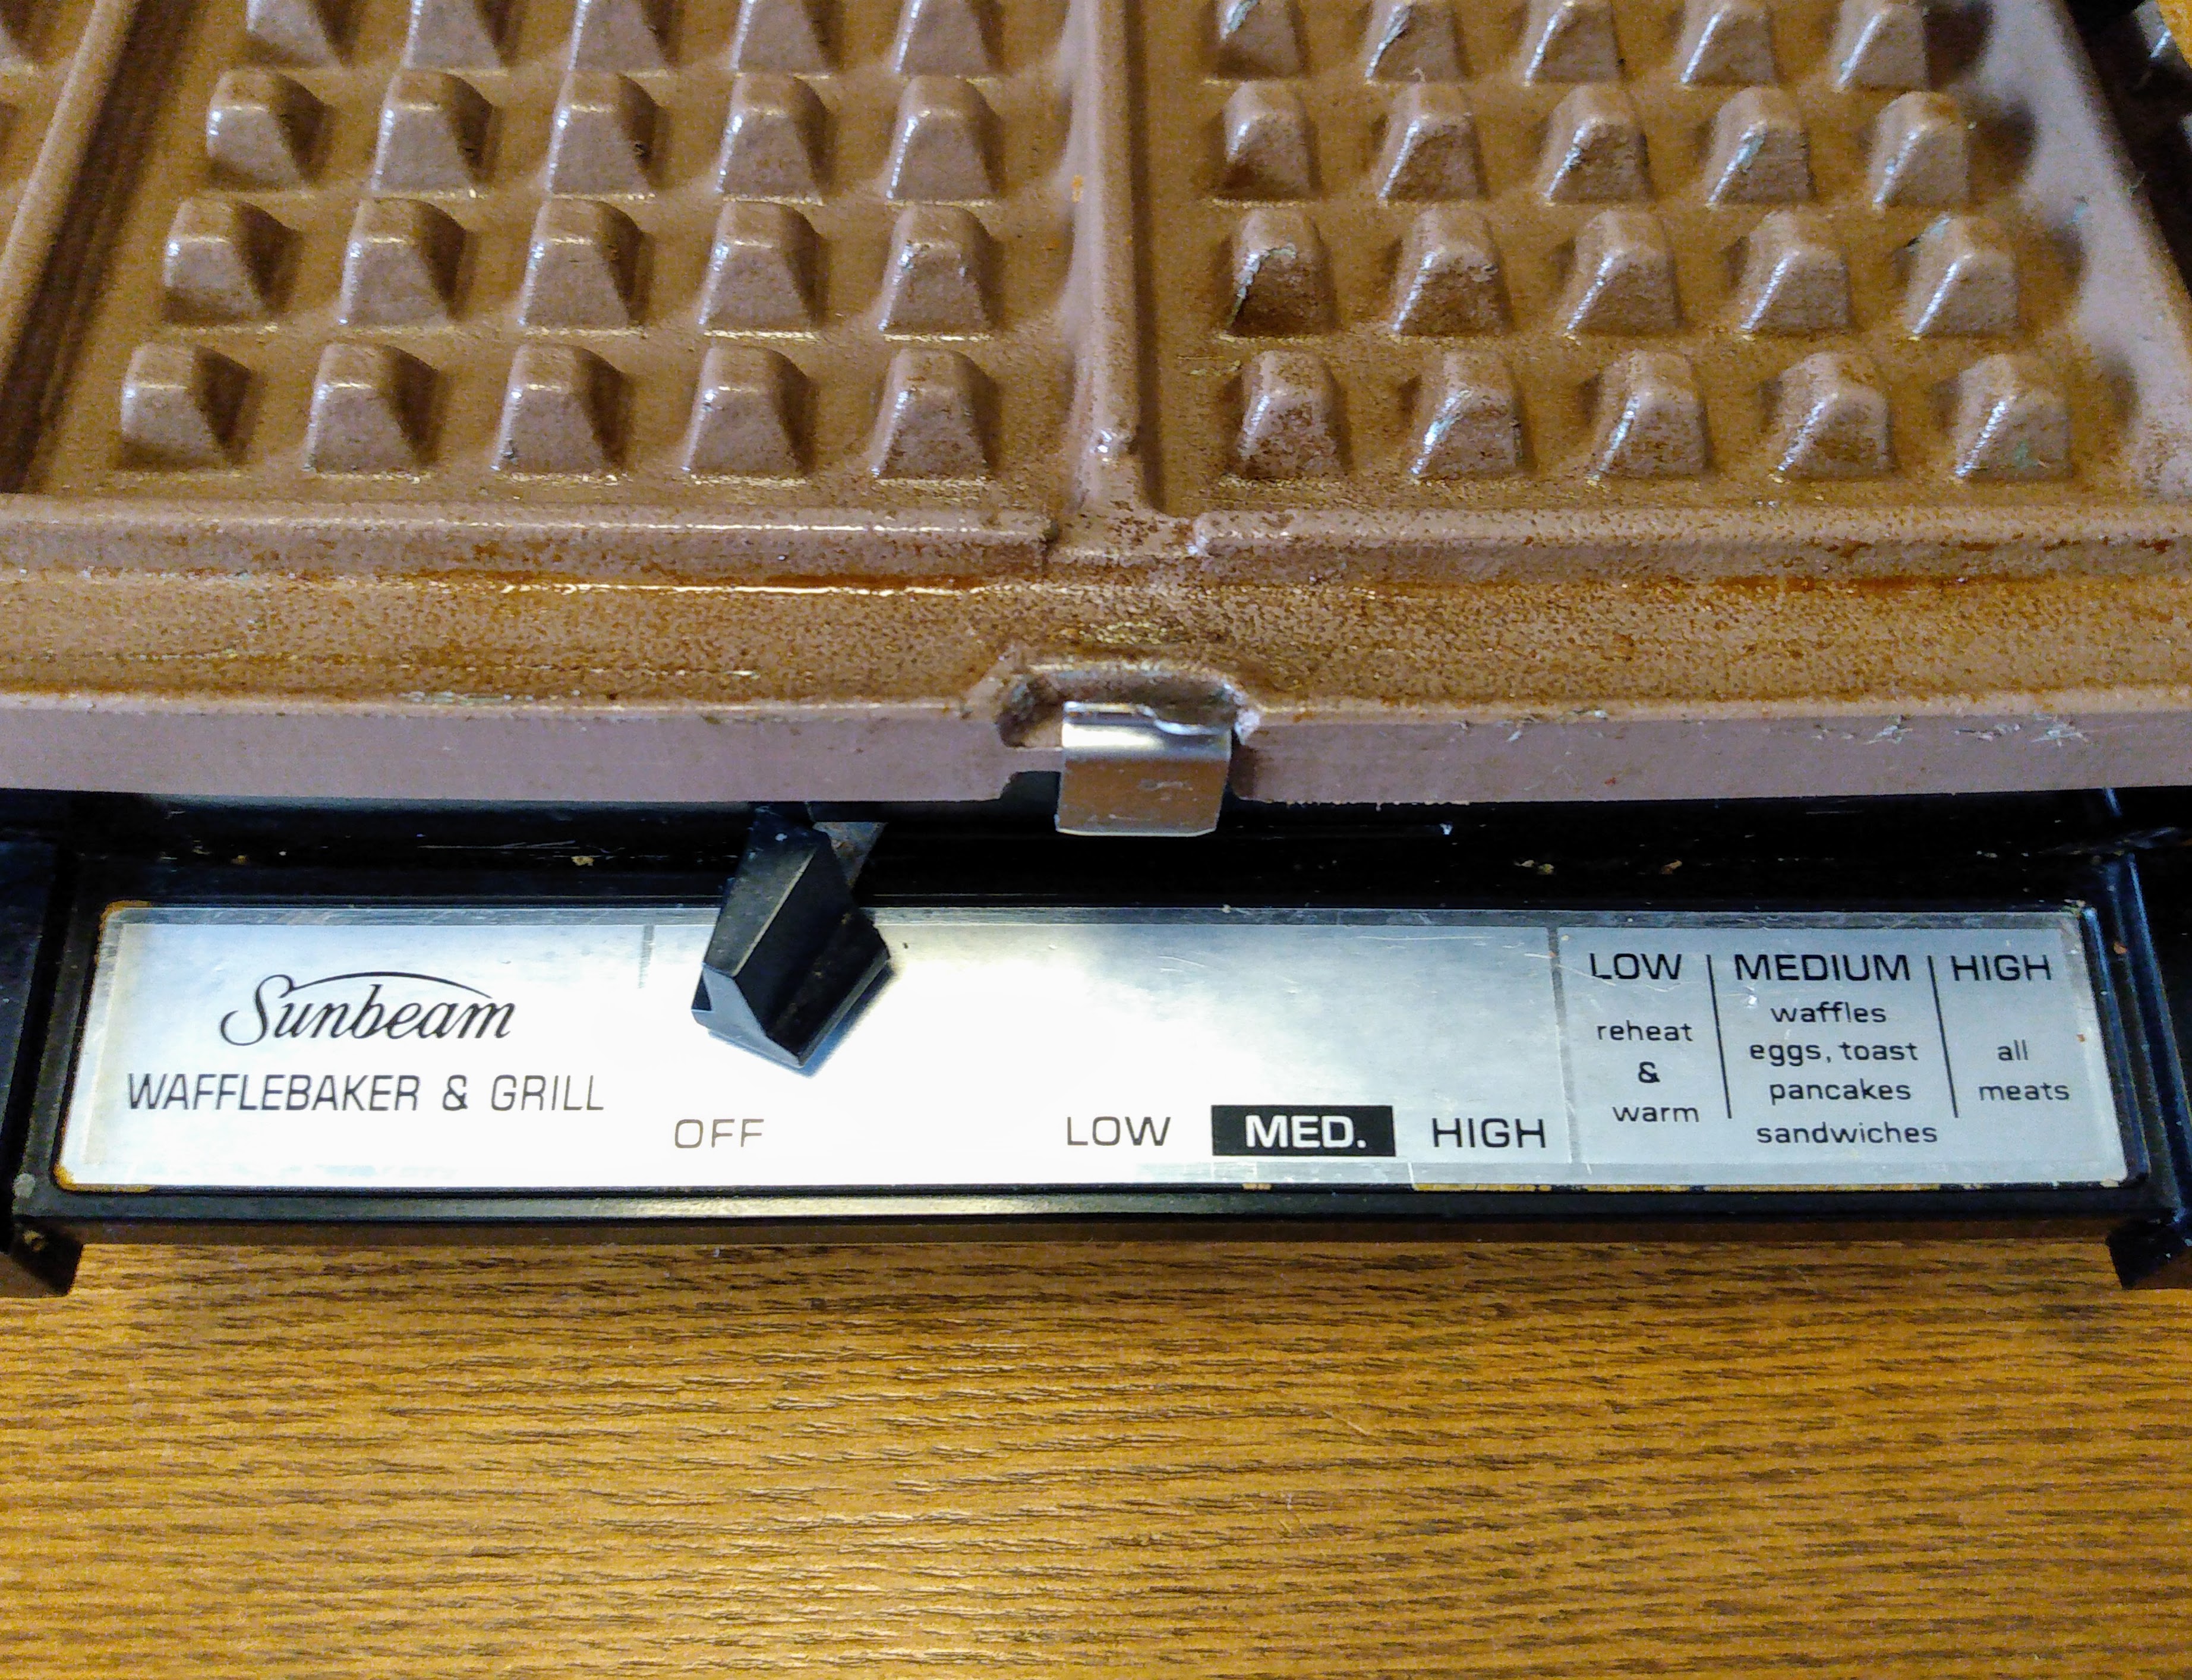
It looked brand new when I bought it. I hope it lasts for many, many years. I believe this waffle maker was built at a time when durability was one of the main objectives.


The griddles are reversible and the waffle maker can be converted into a smooth griddle for cooking eggs or pancakes.

As near as I can tell the Sunbeam WB-K was made in the 1960's. 

If you are in need of a waffle maker, I advise looking for a vintage Waffle Maker. You may be able to find one at a thrift store, flea market, or estate sale. Online sites like eBay and Etsy have several listings for vintage Waffle Makers. These old waffle makers stand up to a lot of use. Consider that you will probably get your money's worth when you buy an older appliance like these.

Do you like vintage waffle makers?
Are you a fan of Belgium style dimples or American style dimples in your waffles?
Tell me any waffle stories that you have, in the comment section. I'd love to read them!


Tuesday, November 16, 2021

Chicken And Dumplings


I am sharing the dumpling recipe that serves our family perfectly, at this time. Dumplings are always best the first time they are served. I try not to make extras because they are not our favorite reheated as leftovers. 


I am not including the chicken soup part of the recipe. Make a basic chicken soup with  your choice of vegetables and seasoned as you like. Once the soup is made and has reached a simmer the dumplings come into play. Whip up a batch of the dumpling dough and cook them on the surface of your simmering soup.

This is a very comforting meal on cool nights. Especially at this time of year!

Herbed Dumpling Recipe

1 1/2 cups Flour

1 tsp. Salt

1/4 tsp. Dried Thyme

1/4 tsp. Dried Parsley

2 tsp. Baking Powder

3 TBS. Cold Butter

2/3 cup Milk

Mix together dry ingredients.

Cut in butter with a pastry blender or grate in butter with a grater.

Stir in the milk.

Drop by spoonfuls onto the surface of the soup.

Cover pot with lid and simmer for 15 minutes.


Serves 4 


Tuesday, November 9, 2021

Crockpot Egg Casserole Recipe!

I use ordinary, unprocessed potatoes in this recipe. I prepare them as I would hash browns, by peeling, shredding, soaking in cold water, and drying the potatoes. Frozen hash browns will work just as well. If you prefer to use frozen hash browns skip the first step of the recipe.

 
Draining water from the shredded potatoes.


I sauté the mushrooms and peppers in this recipe. This cooks some of the water out of the vegetables. This keeps the eggs from having a soggy texture.

Sauté the mushrooms until brown.


Half of the potatoes, vegetables, sausage and cheese get layered into the crockpot. And, then the layers are repeated.
Layering ingredients into crockpot.


Crockpot Egg Casserole Recipe

4 Potatoes
2 Tbsp. Bacon Grease or Butter
8 oz. Mushrooms, sliced
1/2 Green Bell Pepper, Diced
1/2 Red Bell Pepper, Diced
1 Small Onion, Diced
8 oz. Shredded Cheddar Cheese
12 Eggs
1 cup Milk
1 tsp. Salt
1 tsp. Ground Mustard
1/4 tsp. Pepper

Step 1. Prepare Potatoes

Peel and shred potatoes. Soak in cold water for at least 30 minutes up to overnight. Drain potatoes and pat dry with a clean towel.

Step 2. Prepare Meat and Vegetables

Brown the sausage in a skillet, set aside.
In same skillet sauté mushrooms, bell peppers, and onion in bacon grease or butter until the mushrooms are golden.

Step 3. Assembly

Grease the crock of a 6 quart slow cooker. Layer 1/2 of the potatoes, sausage, vegetables and cheese into the crock; repeat, finishing with cheese.

Step 4. Here Come The Eggs!

In a large bowl whisk eggs until smooth. Add milk, salt, ground mustard, and pepper and whisk to combine.
Pour into the crock over the potatoes, etc.

Step 5. Set And Forget

Set your crockpot on High and cook for 2 1/2 - 3 hours or on Low for 5 hours.

Step 6. Enjoy!

Serve for breakfast, lunch or dinner. This casserole makes a great meal-in-one.

"All you hungry children,
Come and eat it up!":)

Tuesday, November 2, 2021

Hearty Chili Recipe!

 This is the way my Mom makes Chili. It is very flavorful and hearty. I learned from her to use a variety of beans. It makes for a nice presentation.


Hearty Chili Recipe

1 lb. Ground Beef or Turkey or Deer 

1 Large Onion, Diced

5 Garlic Cloves, Minced

4 TBS. Chili Powder

2 tsp. Salt

1 15oz. can Black Beans, with liquid

1 15oz. can Kidney Beans, with liquid

1 30oz. can Pinto Beans, with liquid

1 quart or 1 28oz. can Crushed Tomatoes


In a large soup pot, brown the ground meat. Pour off grease if necessary. 

Add onion and cook until soft.

Add garlic, salt, and chili powder and cook 1 minute.


Add beans and tomatoes.


Simmer 30 minutes. 

Or, pour into crockpot and cook on high 2 hours or low for 5 hours.

Serve once all the flavors have melded nicely.


Serving Suggestions:

Top each bowl with shredded cheese, sour cream, and green onions.


Serve tortilla chips, corn chips or cornbread on the side.


Add a big scoop of macaroni and cheese to each bowlful to make delicious Chili Mac.


Tuesday, October 26, 2021

The Best White Chili Recipe!


1/4 cup Oil or Chicken Grease

1 Onion, diced

5 Garlic Cloves, minced

1 1/2 tsp. Oregano

1 tsp. Cummin

1 Shake Cayenne Pepper

2 tsp. Salt

1 6 oz. can Green Chili's

3 cups Cooked White Beans, Canelli, Great Northern, Navy, or Garbanzo (or 2 cans with juice)

2 cups Cooked Chicken, Shredded or Chopped

4 cups Chicken Broth

16 oz. Sour Cream


Sauté onions in oil or grease until translucent, about 5 minutes. Add minced garlic, oregano, and cumin, sauté until fragrant, about 1 minute 


Add cayenne, salt, green chilies, beans, chicken, and broth. Bring to a simmer. Simmer 20 minutes, stirring occasionally.


Mix in the sour cream. Continue to cook until just heated through.


Enjoy!

This soup is tasty on it's own or garnished with tortilla chips, and shredded cheese.


Tuesday, October 19, 2021

Sweet, Rich, Gluten Free Cornbread Recipe!


1 cup Corn Meal
1 cup Masa Harina
1/4 cup Sugar
1 tsp. Salt 
1 tsp. Baking Powder
1/4 tsp. Baking Soda
1 1/4 cup Buttermilk
1/2 cup Melted Butter or Bacon Grease
2 Eggs

In a mixing bowl blend the dry ingredients together. 
Add the buttermilk, fat, and egg. Combine thoroughly.
Pour into a greased 8×8 inch pan or 8 inch iron skillet.
Bake 20-25 minutes at 350° F.


Other Corn Bread Recipes:


Tuesday, October 12, 2021

Tightwad Tip: Save Grease


I save grease from cooking hamburger, chicken skins, chicken broth, ham bones, bacon, etc..... 

Fat rendering out of fried chicken skins.


I use it for frying eggs, sauteing onions, spreading on tortillas before warming them in a skillet. Chicken grease is soft when chilled. Beef grease is hard when chilled. Pork fat is somewhere in between the two.

The harder fats can be used in place of shortening in savory pastries. Chicken fat works fine in tortillas. Bacon grease tastes good in cornbread as a replacement for butter or oil. 


To save grease: 

I recommend that you pour grease from browned hamburger meat into a heat safe bowl and then chill in the refrigerator until firm. Oftentimes  the fat poured off hamburger meat has water at the bottom. Scoop the hard fat off the top and put in a jar to store.

Collecting fat from the top of broth
after chilling in the refrigerator.
To save fat from chicken broth or other types of broth:
Boil bones and trimmings for several hours. Allow broth to cool. Chill in the refrigerator overnight. The fat will solidify on the surface of the broth. Scoop the solid fat off the broth and store it in a jar in the refrigerator.
Spreading chicken fat on a corn tortilla
 before warming it in a skillet.

To collect fat from bacon or fried chicken skins just pour the fat into a glass jar when it is still hot and in a liquid state.

I can't say how long this fat will last in the refrigerator. I keep mine for several weeks until it is all used up. I only throw it out if it smells rancid, but normally it is gone long before this point.

Tuesday, October 5, 2021

Baked Beans From Scratch


Although this is a great recipe any time of year it is particularly good this time of year to take to Cook Outs and Weiner Roasts!

This recipe is a real budget saver, too. Everyone knows that beans are a cheap source of protein, and in this recipe you reap maximum savings by using dried bean instead of canned beans.

I use pinto beans in this recipe because they suit our taste and texture preferences. You can use any type of beans that you like, though.


Baked Beans From Scratch

1 lb. Dried Pinto Beans

Water

Pinch of Baking Soda


2 Tbsp. Oil or Bacon Grease

 1 Bell Pepper, Diced

1 Onion, Diced

1/4 cup Sugar (use 1/2 cup if you like sweet baked beans.)

1/4 cup Molasses

1/2 cup Ketchup

1 Tbsp. Mustard (Prepared)

1 tsp. Liquid Smoke

2 tsp. Worcestershire Sauce

1/4 tsp. Chili Powder

1/8 tsp. Ground Pepper

Salt to taste


Step 1.

In a large bowl place the dried beans and pinch of baking soda. Add a quantity of water and soak the beans for 12-24 hours. As the beans expand check periodically to be sure that they stay submerged. Add more water as needed.


Step 2.

Drain the beans and turn into a large pot. Cover the beans with fresh water. Bring to a simmer over medium heat. Simmer gently until the beans are tender, about 2 hours. Remove from heat. Pour off excess cooking liquid. Leave an amount of water that comes even with the level of beans in the pot 

This portion of the recipe can be done ahead of time. The cooked beans can be stored in the refrigerator for a few days.


Step 3.

Saute bell pepper and onion in hot oil or bacon grease until soft and translucent. Add sugar, molasses, ketchup, mustard, liquid smoke, and spices. Warm through, then add the cooked beans with their remaining liquid.


Step 4.

Pour beans into a casserole dish or iron skillet and bake at 350° F. for 1 hour. This step gives the top of the baked beans a nice caramelized effect. Enjoy!

(Alternate Step 4. 

Just heat the baked beans on the stove top and simmer for 30 minutes.)


Cowboy Beans Variation:

Use a mixture of beans (pinto beans, black beans, kidney beans, butter beans, etc.)

Add 1/2 a pound browned ground beef

And 1/2 pound sliced hot dogs