Then I cut out a dress. If you're ever living in an RV and need a large flat surface, keep this tip in mind. ;)
Tuesday, November 26, 2024
Sewing Projects In November
Then I cut out a dress. If you're ever living in an RV and need a large flat surface, keep this tip in mind. ;)
Thursday, November 21, 2024
Two Good Pie Crust Recipes
I like to use a solid fat in pie crust like butter, lard, or shortening to make the crust nice and flaky. But, to save some pennies, in this first recipe, I cut my solid fat by using half oil.
Simple Single Pie Crust
1 1/3 cup Flour
1/4 tsp. Salt
1/4 cup Oil
1/4 cup Butter, cold
3 1/2 TBS. Cold Water or Milk
Mix the flour and salt.
Add the oil and stir until the mixture looks crumbly.
Grate the cold butter into the mixture. Stir gently to distribute the butter flakes.
Add the water in a few dribbles in different places in the mixture. Stir to form dough.
Shape into a disc. Wrap in plastic and chill 10 minutes before rolling out.
Jennifer Smith's Large Batch Of Pie Crust (2 Double Crusts or 4 Singles)
5 cups Flour
1 tsp. Salt
2 cups Shortening
1 Egg cracked into a measuring cup
2 TBS. Apple Cider Vinegar added to the egg in the measuring cup
Water to fill the measuring cup to the 1 cup line
Mix flour, salt, and shortening until crumbly.
Add the liquid ingredients. Stir until the dough starts to come together.
Form dough into 4 discs. Wrap in plastic and chill for 15 minutes before rolling out.
Tuesday, November 19, 2024
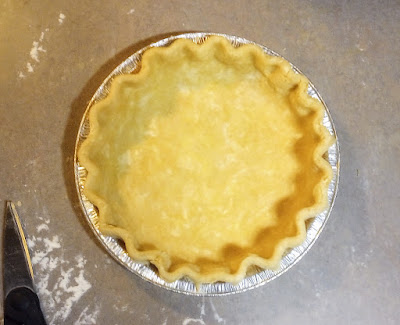
Demonstrating How I Flute A Pie Crust
I roll my pie pastry out.
I want it to over hang the pie pan by an inch or two.
For a double crust: wet the top edge of the bottom crust.
I dip my fingers in the water and rub them on the crust before adding the top crust.
I trim the pie crust with scissors.
I hold up the overhanging pastry with my left finger tips.
I rest my scissor blade on my middle finger at the first knuckle. That is how I measure the overhang and trim it to the right length.
I push my pointer finger against the edge of the crust.
Tuesday, November 12, 2024
Dress Making Journal
This is the story of the dress made last week. I have been tasked with making a flower girl dress for my daughter. Yay! The wedding is next month. I have been given a picture of what the bride would like the flower girl dress to look like:I noticed details right away:
I will purchase a crinoline to go under the skirt and give it the poofy shape.
Tuesday, November 5, 2024
Crayon Drawing
I decided to use crayons to make some rough drafts of my next art work. These crayons in the picture are the ones that I was working with. To say, not the finest art supplies, would be an understatement. This piece was inspired by a water color picture that I saw on Pinterest. I figured that I'd have to use colored pencils for the final picture. But, I was so surprised with how nice the crayons worked for my drafts that I decided to go ahead and use crayons for the final picture, too.
I started by very very lightly sketching the out lines for the ducks. Then I added colors. I did 3 practice copies
This is the final picture!
Close up of the faces.


