Showing posts with label Craft. Show all posts

Monday, August 21, 2023

Stuffed Baby Whales Toy Tutorial Part 2: The Eyes

To sew the eyes:

I cut the eyes from a piece of tightly woven, white cotton. I use the back of a pen for a template.


I place the eye on the whale and use a pin to keep it in place.


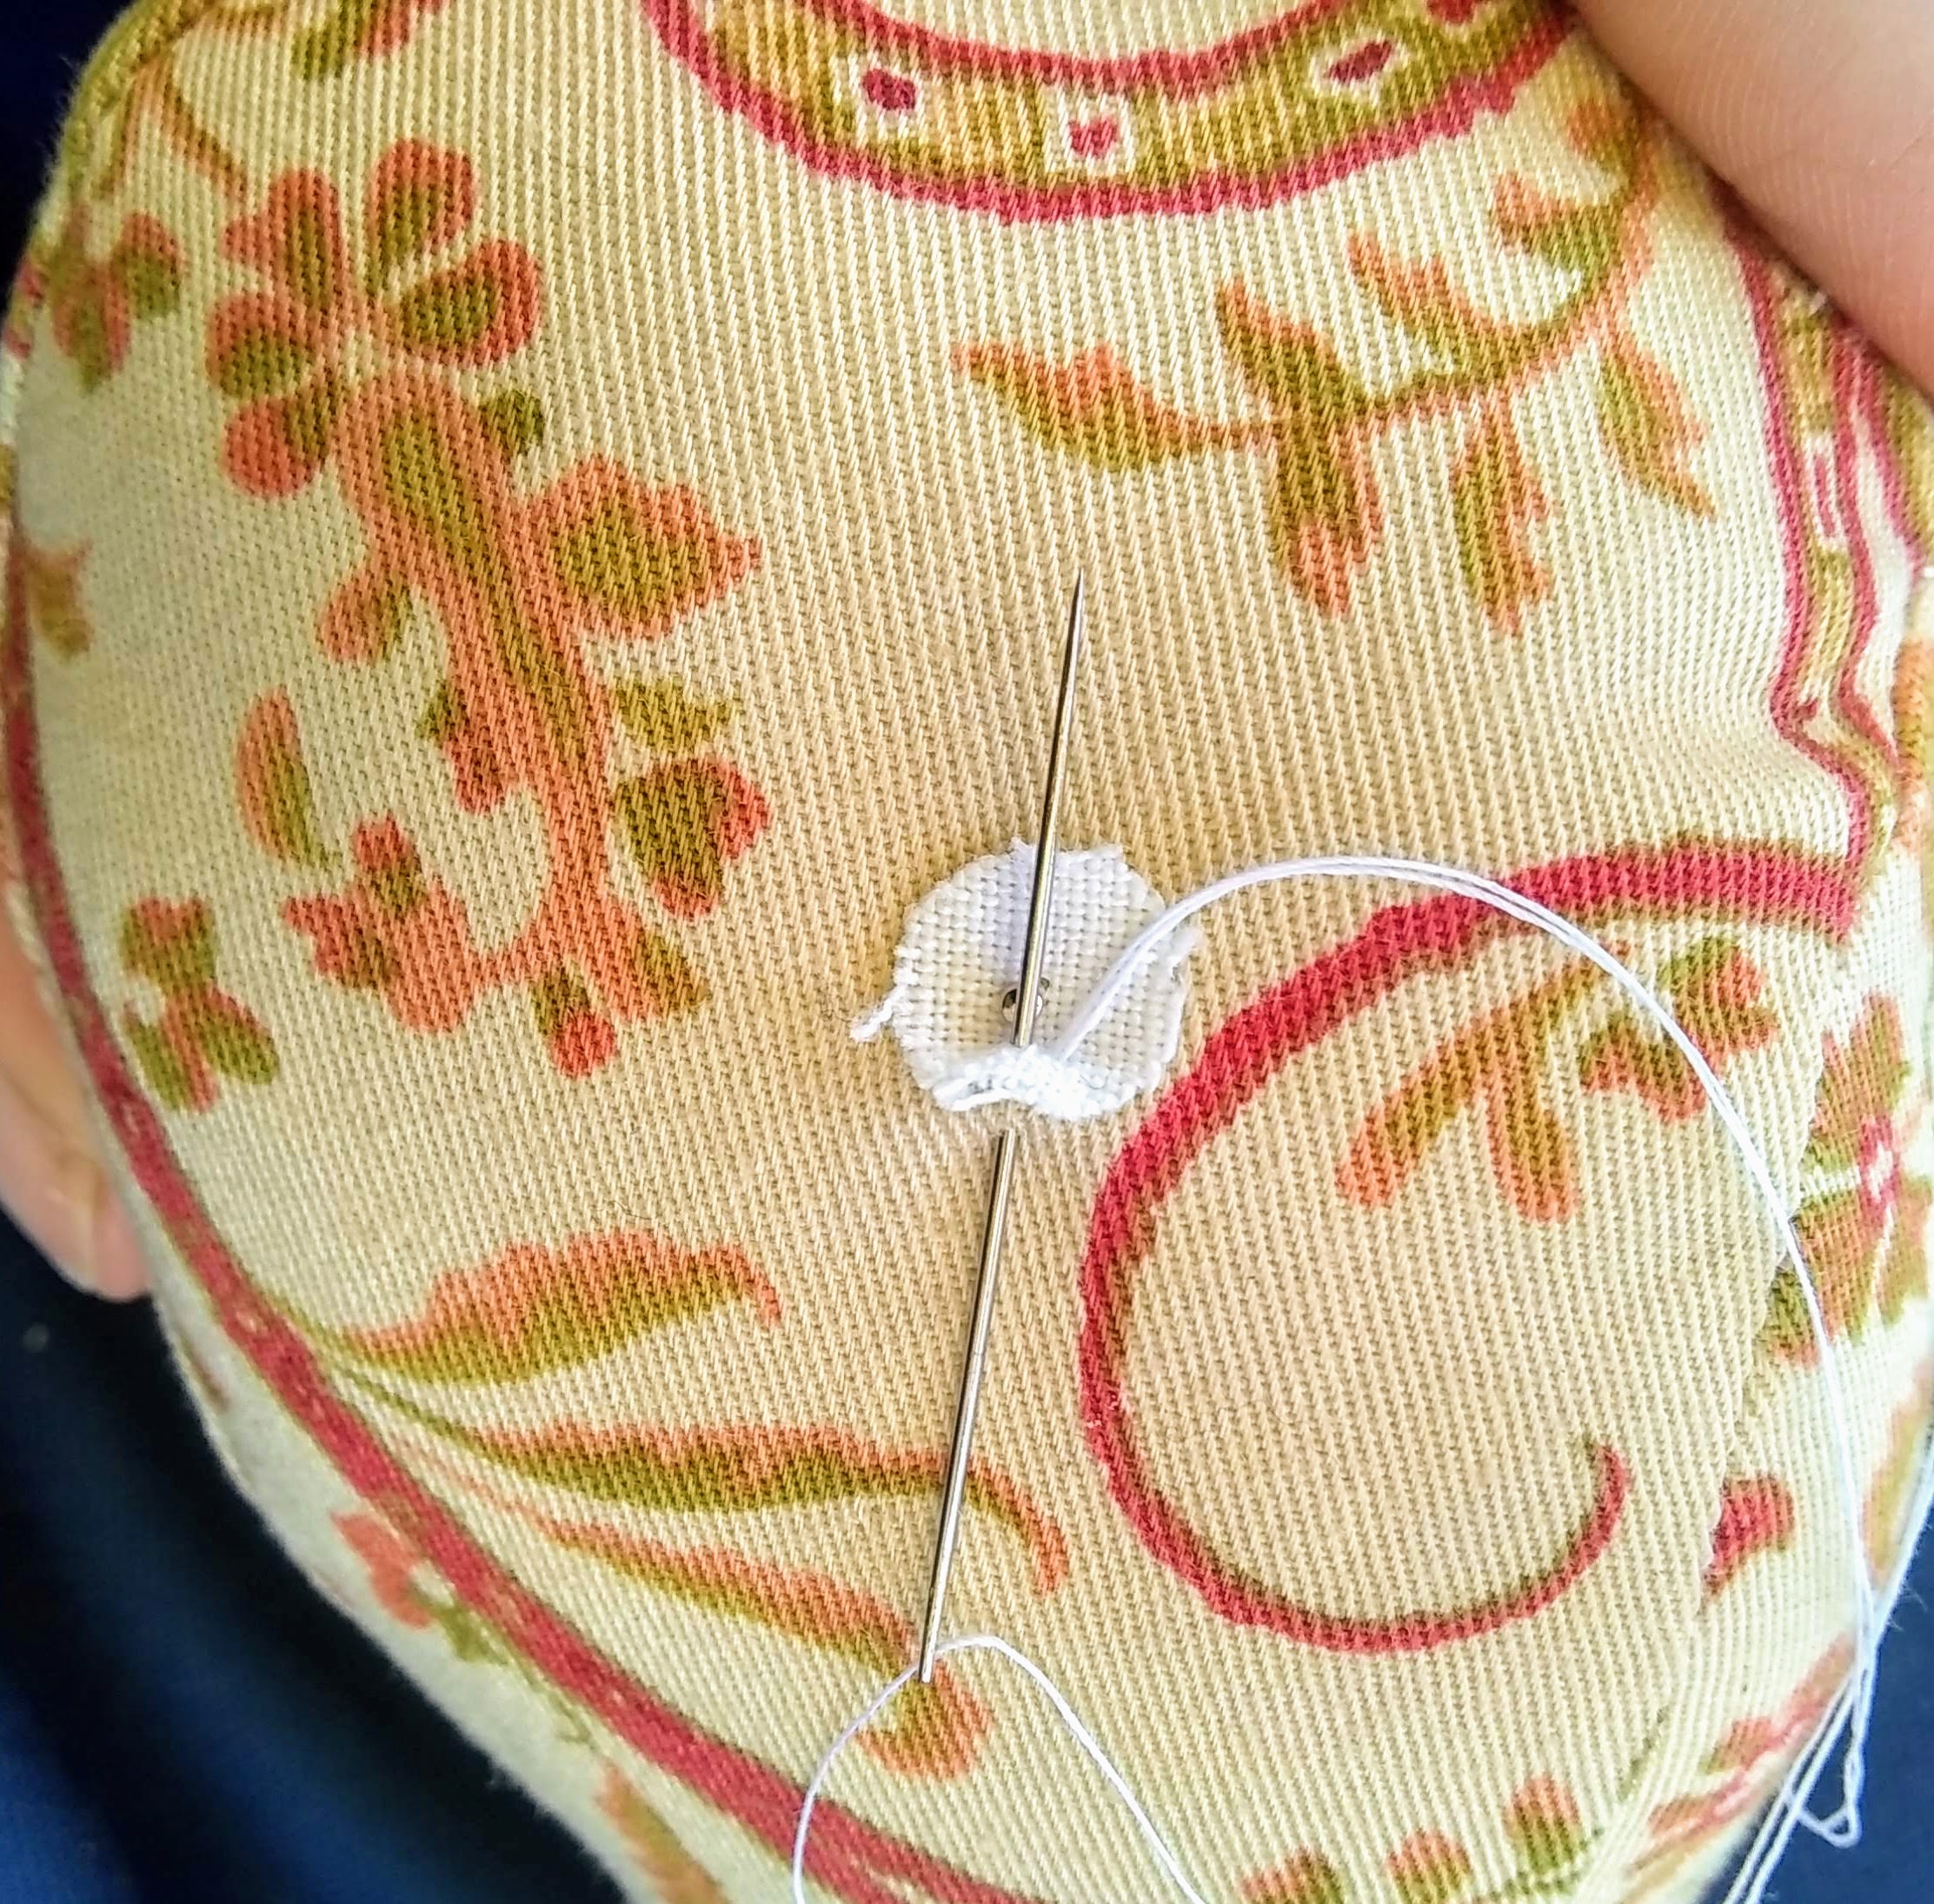
I thread a needle a tie a secure knot at the end. I poke the needle into the whale a short distance from the eye. I am careful to put the point of the needle between the weft and warp of the weave.


Pull the needle up through the edge of the eye. And pull the knot through to the inside of the whale.


Make a small stitch around the edge of the eye and through the whale fabric.


Pull the stitch down to a small loop.


Using the tip of my needle I lay the stitch just where I want it as I pull the thread tight. 


Keep stitching around the edge of the eye.


Go all the way around.


And then stitch all the way around for a second time.


To tie my thread off, I tie a knot in the the thread.


I tie another knot right on top of the first knot.


I poke the tip of my needle, trying to place it between the weave. I have my needle come up a short distance from the eye.

I pull the knot through the hole, and down into the whale.


Clip the thread off. 

Next, the pupil of the eye has to be added.

I use a double threaded needle. I tie a knot and pull the knot to the inside of the whale.
I make the pupil with a padded satin stitch. Meaning; I make stitches in one direction and then stitch over top of the first stitches in the opposite direction.

To tie the thread off; I tie a single knot in the thread then poke the tip of my needle down, trying to place it between the weave of the eye fabric and the whale fabric beneath.

I put the needle up some distance away from the eye. I pull the knot through the fabrics. I help the knot go through by pushing down with the tip of my needle while keeping tension on the thread by pulling tightly with my fingers.

Clip the thread.

Tada! Finished!


Monday, August 14, 2023

Stuffed Baby Whale Toy Tutorial Part 1: The Body


I start by cutting the pieces out. I usually have some scraps or remnants. 


I use denim from jeans a lot of the time. 


It is fun to make the belly of the whales out of a contrasting printed fabric.


If I am not using a print material for the belly I will use the denim wrong side out.


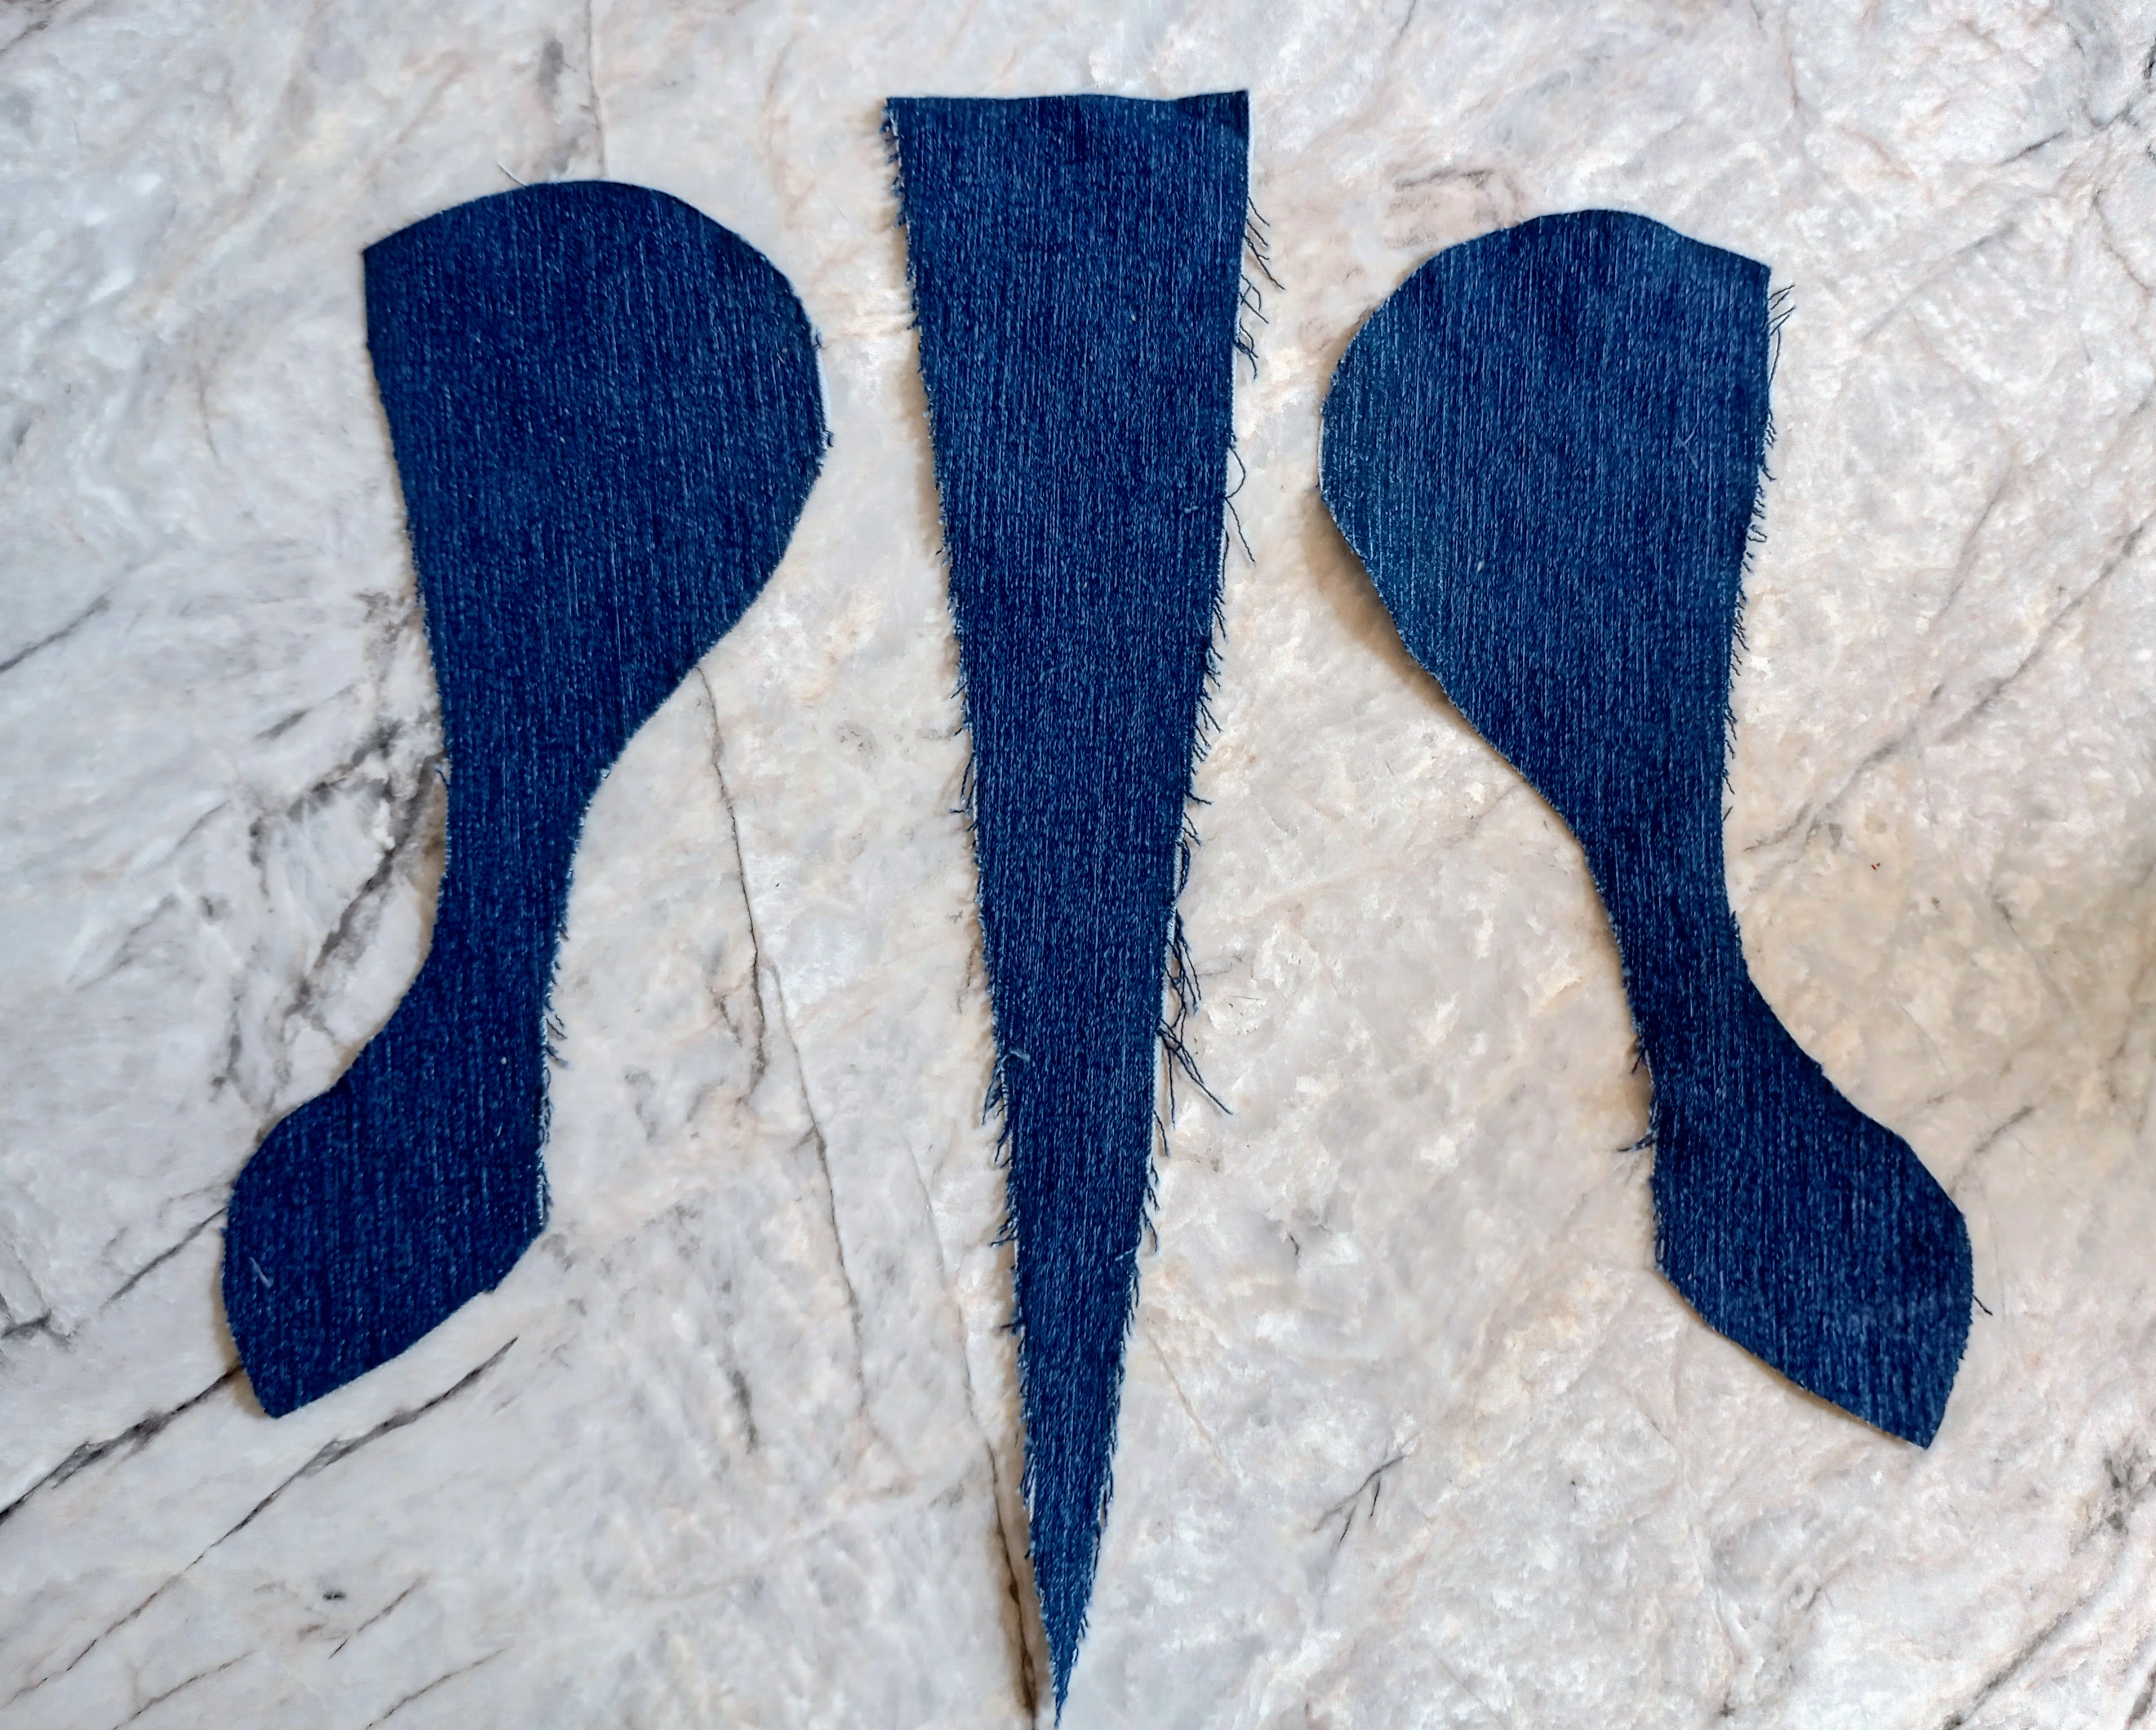
Here are all the pieces for the upper whale laid out:

Step 1. With right sides together pin the center to one of the sides. Then stitch and zigzag the seam.

Step 2. Line up the other side to the center piece, pin, stitch, and zigzag.

Lining up the tail can be a little tricky. Make sure you fold open the first seam (from step 1.) Line the tail pieces up and pin in place. Pin it on the outside of the first seam. You want to be sure your stitching incompasses the first seam at the end of the pointed center piece so as not to leave any of the raw edge exposed.
You can check to see if your seam is deep enough by turning the tail over the second row of stitching should be a little wider seam that the first seam's stitching.

Step 3. Take the flipper pieces and pin them right sides together, stitch and clip curves. Flip right side out.
Step 5. Pin the flippers to the right side of the belly piece, baste.

Step 6. Zigzag stitch the raw edges of the belly piece and the upper assembly where the mouth opening will be. This will keep the edges from unraveling during the maneuvering of flipping the whale right side out and stuffing with polyfill.

Step 7. With right sides together, pin the belly piece to the upper assembly lining up the centers and tails. Stitch leaving and opening at the mouth, clip corners and zigzag to finish the raw edges.

Step 8. Turn whale right side out. A wooden skewer comes in handy with the corners of the tail.

Step 9. Stuff the whale with polyester filling. The wooden skewer is handy for this, too.

Step 10. Pin the opening closed.

Step 11. Using a ladder stitch, stitch the opening closed.


The body of the whale is done. All that remains is to sew on the eyes. 


Next week: How to sew on whale eyes.


Monday, May 29, 2023

Dress Sewing Progress In May


Before I get to the sewing progress I want to share a picture of the peonies that I have been enjoying. I have cut peony bouquets from yards where no one lives in prior years, but this is the first year that I have had my very own peonies blooming. They are gorgeous! I am so happy to have peonies of my very own. :) Fun fact: Peonies are the state flower of Indiana; land of my nativity.
It has been a beautiful month. This past Saturday the weather was so idilic. I was enjoying the morning outdoors. I hung a load of laundry on the clothesline. There are few things as satisfying as a load of clean diapers flapping on the clothesline. 
It was such a peaceful morning!
I collected a bundle of bachelor buttons to dry.* My bachelor button patch is starting to bloom like crazy. 

*I have since discovered that drying bachelor buttons doesn't work. At least, this method doesn't work.

On to the sewing content:
I did a lot of piddly sewing projects this month between stints of working on the formal dress.

I picked up this brightly colored floral XXL skirt at thrift store. I liked the pattern and I knew there would be plenty of material to make something for my little girl.

I cut out pieces to make a jumper with pockets.

I finished the neck and arm holes with bias tape.

I added lace at the hem.

I was way off with the pocket placement. They are too low; like down at her knees. That is a bummer! I waited until all the seams were finished to check the placement, though, so the pockets are going to stay in the wrong place.

This jumper was a nice one day project. I was able to sew it on a Saturday when I had a lighter load, as far as household duties go.


I did some hand basting on the tulip sleeves for the formal dress. 

I set my phone camera on the shelf above my head to capture these shots.

I found this skirt when we were out thrift shopping, too. It was a size 10-12 girls. Much too wide for my 3 year old. So I put a new waistband on it.
It took me about 45 minutes to take all the stitches out of the original waistband. I decided to reuse the elastic, so that was an extra 15 minutes to take the serging out of the elastic.
I like to use a really light weight fabric for elastic casings. Stiffer fabrics sometime keep the elastic from being as springy as I would like. I used some viscose lining fabric for the casing on this project.

Below, is a skirt that needed to be narrower for my daughter to wear it now. I took it in at few points along the waist. The print is really cute on her and I like the pleating details. They add a nice flare.

This skirt needed some length. 
I had some red fabric that matched. I added a flounce with a lace trim. Now it is a perfect patriotic skirt!

I crafted this black skirt from a spaghetti strap top. I just cut off the top portion and added a viscose casing for an elastic waistband. It is a really comfy jersey material. I think she is going to wear this one a lot.

I sewed the tulip sleeves on to the bodice of the formal dress. I assembled the skirt and skirt lining. I sewed the bodice to the skirt.

When I had my daughter try on the dress she immediately began twirling around and swirling the skirt. This is a really good dress for twirling!


I resorted to stitching the zipper on by hand because I can't find a zipper foot for my sewing machine. I used to have a zipper foot, but for some reason it is gone now.
This is an invisible zipper. It turned out pretty invisible. It is not my best zipper install job, though. I certainly wouldn't want my 4-h Judge of yesteryear trying to work the zipper up and down. It moves, but it is quite difficult! I must have stitched it too close to the zipper teeth. 

The dress is not finished. May is not over yet.
I will keep working. I want her to be able to wear it to a wedding on Saturday. The pressure is on!