Tuesday, November 26, 2024

Sewing Projects In November


I finished this dress for my daughter. It's one of the dresses that I wanted to make for her upcoming birthday.
We have been living in an RV for the last several months. There are not any large enough surfaces to lay out material to cut. This is how I cut out the material for the dress. 

I lift the mattress off the main bed and prop it against a wall. Under the mattress is a nice large wooden plank. 

Then I cut out a dress. If you're ever living in an RV and need a large flat surface, keep this tip in mind. ;)
On Saturday, I can set my sewing machine up at the table. Nevermind the milk in the picture. I had left some frozen items out on the table that day to thaw, including the milk. :)

On week days I do a lot of hand sewing jobs while I sit and homeschool. I was basting sew-in interfacing on the collar and cuff pieces in this picture.
I still have to make a pinafore to go with the butterfly dress. I have this pink material picked out.
This is the fabric that I have picked out for the third and final dress and pinafore. I will be hard pressed to finish for her birthday, but we shall see.

Another project that I finished this month was the golden mock up for the flower girl dress. (You can read about it in this blog post incase you missed it.)
Now, I have started working on the real flower girl dress. Boy, am I frustrated with the rookie mistakes that I have been making!

I have the bodice assembled. I have been having a lot of trouble with the sleeves.


I had my iron heat setting too high and messed up the first sleeve.


The extra heat left ripples in the fabric. The damage was not very obvious. 

I wanted to cut out a new sleeve, and start over. But first I had to cut out the skirt pieces to be sure I had enough leftover fabric to cut another sleeve.

I have found that the mattress with the bedding removed is firm enough for me to lay out fabric and cut pieces on it. No more propping the mattress up and blocking the door way.
 
Anyway, I had enough fabric to cut out a new sleeve. Yay!

I sewed the new sleeve all together and went to set it in the bodice only to find that I had put it together with the wrong side of the fabric facing out! Agggggh!

The fabric is so hard to tell right side from wrong side. Maybe I could get away with using it wrong side out? But, the back part of the sleeve with the double notches was at the front, and the front of the sleeve with the single notch was in the back. The curve at the top of the sleeve is not symmetrical and can't be reversed.

Oh well, I had to do a lot of stitch ripping. I am going to have to put together with the right side out this time. I have not made as much progress as I had hoped on this flower girl dress this month.

And that is the conclusion of my sewing progress this month. Pray for me to not make any more mistakes on this flower girl dress. It is getting discouraging! 

Thursday, November 21, 2024

Two Good Pie Crust Recipes


I like to use a solid fat in pie crust like butter, lard, or shortening to make the crust nice and flaky. But, to save some pennies, in this first recipe, I cut my solid fat by using half oil.

Simple Single Pie Crust

1 1/3 cup Flour

1/4 tsp. Salt

1/4 cup Oil

1/4 cup Butter, cold

3 1/2 TBS. Cold Water or Milk

Mix the flour and salt.

 Add the oil and stir until the mixture looks crumbly.

Grate the cold butter into the mixture. Stir gently to distribute the butter flakes.

Add the water in a few dribbles in different places in the mixture. Stir to form dough.

Shape into a disc. Wrap in plastic and chill 10 minutes before rolling out.


Jennifer Smith's Large Batch Of Pie Crust (2 Double Crusts or 4 Singles)

5 cups Flour 

1 tsp. Salt

2 cups Shortening 

1 Egg cracked into a measuring cup

2 TBS. Apple Cider Vinegar added to the egg in the measuring cup 

Water to fill the measuring cup to the 1 cup line

Mix flour, salt, and shortening until crumbly.

Add the liquid ingredients. Stir until the dough starts to come together. 

Form dough into 4 discs. Wrap in plastic and chill for 15 minutes before rolling out.


Tuesday, November 19, 2024

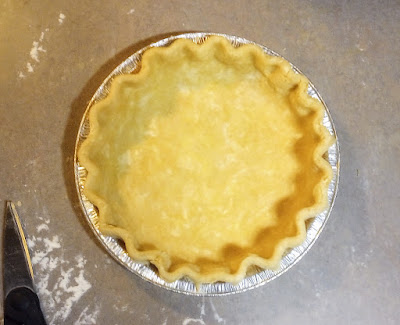
Demonstrating How I Flute A Pie Crust

I roll my pie pastry out. 

I want it to over hang the pie pan by an inch or two.

For a double crust: wet the top edge of the bottom crust.

I dip my fingers in the water and rub them on the crust before adding the top crust.

I trim the pie crust with scissors.

I hold up the overhanging pastry with my left finger tips.


I rest my scissor blade on my middle finger at the first knuckle. That is how I measure the overhang and trim it to the right length.


I push my pointer finger against the edge of the crust.

With the same motion of pushing the edge, I sweep the edge up and fold it under.
This is how it folds:

I go along the pie crust pushing with my left hand pointer finger and cradling the inside of the crust with my right hand pointer and thumb shaped into a chicken beak.

And that is it. Just practice a lot and you should be able to perfect your technique!


Tuesday, November 12, 2024

Dress Making Journal


This is the story of the dress made last week. I have been tasked with making a flower girl dress for my daughter. Yay! The wedding is next month. I have been given a picture of what the bride would like the flower girl dress to look like:

I noticed details right away:
The dress needs puffy sleeves with wide casings, 
a transparent overskirt, 
a green sash and tie, 
and covered buttons.
I think I see piping trim at the neckline.
I think the skirt needs to be a circle skirt as opposed to a paneled skirt.
I would work with the bodice from the pattern that I had just used for the purple dress last month.

I have a pattern for a dress with puffier sleeves. That pattern is in a larger size. I took the sleeve shape from that pattern and sized it down. 

I wanted the bodice to be less baggy. I scooched the side seam over and the arm holes and made a new pattern piece.

The back of the bodice has to be converted from a zipper closure to a button closure. I had a dress pattern with a button closure on the back. That was the pattern that was too many sizes too big. I took the bodice back piece from that pattern and measured how much overage was allowed beyond the center back line to make the button overlap. Then I took that measurement and added it to my bodice back piece.

I had to make a mock up to check all my changes. I basted the sleeve in place. It looked good. I could go ahead and stitch it together.
The skirt was the next tricky part. I had a dress pattern with a circle skirt. I used the circle skirt pieces. I had to make some slight alterations to the curve at the waist. The curve needed to be an 1/8" deeper. I, also, had to figure out a placket to add to the back for the button closure.

I sewed an easement stitch line along the top of the skirt and fitted the skirt to the bodice. It worked! I reenforced the seam and finished the edges. Also, I was lining the whole dress. You can see the lining in this picture.

I narrow hemmed the dress.
Lastly, I had to sew on the buttons. Finding matching buttons would be difficult. On the real flower girl dress I am going to use covered buttons, so that won't be difficult. But, for the mock up I needed something to go with gold. 
By the way, I didn't mention this, but I have only been working with materials that I have on hand. Without going to the store, could I find buttons that matched? Yes, thanks to Sarah from Lilacs and Springtime! A while ago she had sent me a box of sewing goodies.  These metallic gold buttons were in that box. Perfect! Thank you, Sarah!

The dress is done!

I will purchase a crinoline to go under the skirt and give it the poofy shape. 

For the real flower girl dress the only fabric that I have to buy is the over skirt material. 
I have some light colored ivory taffeta leftover from the flower girl dress that I made for my little sister when I got married 12 years ago. I also have some sage green satin. I have the lining, interfacing, and covered buttons from thrift store shopping.

I am going to look for a zipper foot to use on my machine. If I find one, I will sew in piping at the neckline. 

I am excited to get started on the real flower girl dress!


Tuesday, November 5, 2024

Crayon Drawing


I decided to use crayons to make some rough drafts of my next art work. These crayons in the picture are the ones that I was working with. To say, not the finest art supplies, would be an understatement. This piece was inspired by a water color picture that I saw on Pinterest. I figured that I'd have to use colored pencils for the final picture. But, I was so surprised with how nice the crayons worked for my drafts that I decided to go ahead and use crayons for the final picture, too.

I started by very very lightly sketching the out lines for the ducks. Then I added colors. I did 3 practice copies 


This is the final picture!

Close up of the faces.

Close up of the fence in the background.

Close up of the dandelions.
Close up of the feet.
Maybe this will make you consider trying crayons for artwork. It is harder for me to use my good colored pencils because the children use them if I get them out. That's okay, but the pencils are harder to keep track of. They roll around. I have trouble tracking them down and getting them back in the box. They are special/expensive so they require more care. And I have no place to leave them out in-between breaks on my project. Our tiny table doesn't even provide us with an adequate amount of space when everyone wants to draw at once.
With all these barriers to using colored pencils I am glad that I found the crayons to be so pleasing and easy to use.