Showing posts with label Freezing. Show all posts

Friday, September 9, 2022

Paw Paw Time!

 We went to the Paw Paw Grove this week 

 to see if there were any ripe fruits. 

 We found a few!


You can read about our Paw Paw harvest in 2020

in a blog post HERE.

Paw Paws are native to the North American continent.

The fruits have a very tropical taste and aroma.

They are a special treat!

This is the time of year when many 

treats are being harvested.

Apples, pears, and grapes,

are a few that come to mind.

It has been several years since I have had

any local pears or grapes.

Genesis 1:11 
And God said, Let the earth bring forth grass,
 the herb yielding seed, 
and the fruit tree yielding fruit
 after his kind, whose seed is in itself, 
upon the earth: 
and it was so.


Have you been busy with harvesting

or preserving?

Let me know your favorite fruit!


Tuesday, June 7, 2022

Reuse Cereal Bags|Tightwad Tip

Tightwad Tip

Reuse Cereal Bags

Tightwad Tip Number One should be: don't buy cereal.

But, if you buy cereal, reuse the bags. They are heavy weight, thick plastic, and don't get holes poked in them very easily.

My favorite use for cereal bags is filling them with chicken backs for freezer storage. There are a lot of sharp boney edges on chicken backs. They inevitably poke holes in zip top bags.

To close the cereal bags use one of the twist ties that, of course, you save from every bread bag. (Wink)


That is my tip for the day!

And before I go, if you are a true Tightwad who doesn't buy cereal, you can always ask your neighbors and friends to save their cereal bags for you. I am not joking! I have a Tightwad friend who actually does this! (And she never buys zip top bags.)

Thursday, January 27, 2022

Tightwad Tip: Save Onion Skins

Save onion skins along with the heads and tails that you cut off when you peel the onion. Throw the scraps in a bag, that you keep in the freezer for the purpose of collecting onion scraps. When it's time to boil some bones for broth be sure to add the accumulated onion skins and pieces. They add a surprising amount of flavor to broth. I was shocked the first time I tried this tip at how much flavor and aroma the onion skins contributed to the broth.

Another plus from the onions is the beautiful dark color that they leach into the broth. Onion Skins are a natural dye and they lend a rich hue to the liquid they are cooked in. The skins get strained out with bones once the broth is done.

Do you use onion scraps?

Have you ever used onion skins to dye anything?

Let me know in the comment section! :)

Tuesday, December 28, 2021

Prize Winning Cranberry Almond Tea Ring


I say, "Prize Winning," because this Tea Ring won State Fair entry and Champion prize at the 4-H county fair more than once 

This Tea Ring delivers when it comes to presentation and flavor. It looks gorgeous and it tastes exquisite!


It does require a few special key ingredient; Cranberries, Almond Paste, and Slivered Almonds.


I always stock up on cranberries in the autumn when they are in season. Cranberries can be frozen very easily to be used at times when cranberries are not in season. Fresh or frozen cranberries work just as well as one another in this recipe.


This recipe is a little time consuming, but it is worth the investment! This recipe makes two, full size Tea Rings. They freeze nicely. If you don't need to serve both Tea Rings you can always freeze one of them for later.


Cranberry Almond Tea Ring

Bread Dough Ingredients:

1 cup Milk

1/2 cup Butter

1/3 cup Sugar

1/2 tsp. Salt

4 cups Flour

2 1/4 tsp. Yeast

2 Eggs + 2 Egg Yolks


Filling Ingredients:

2 cups Cranberry, Fresh or Frozen

1 pkg. (7oz.) Almond Paste

1/2 cup Butter, softened

1/2 cup Sugar

1 Egg

1/2 tsp. Almond Extract

1/2 cup Flour


Glaze Ingredients:

1 Egg + 1 TBS. Water

2 Tbs. Slivered Almonds

1 cup Powdered Sugar

1/8 tsp. Almond Extract

3 Tbs. Milk


Step 1. Make The Dough

Line two baking sheets with parchment paper. 

In pot over medium-low heat combine milk, butter, sugar, and salt; heat until butter melts. 

Remove from heat; cool until warm.

In bowl combine 2 1/2 cups flour with yeast; stir in milk mixture, 2 eggs and 2 egg yolks until smooth and combined. Stir in 1 1/2 cups flour until sticky dough forms. 

Turn dough out onto lightly floured surface; knead until smooth and elastic, kneading in additional flour (about 1/2 cup) to prevent sticking. Transfer dough to buttered bowl; turn to coat. Cover; let rise in warm place until doubled in bulk, 45 minutes.


Step 2. Make Filling:

In blender or food processor pulse cranberries, in batches if necessary, until coarsely chopped; set aside.

At medium speed beat butter (1/2 cup) and sugar (1/2 cup) until fluffy; 2 minutes. Add almond paste; beat until smooth. Beat in egg and almond extract until smooth. Add flour and beat until combined.


Step 3. Assembly

Punch down dough; turn out into lightly floured surface. Divide dough into 2 equal pieces. Cover and refrigerate 1 piece. 


Roll out dough into 17×11 inch rectangle. Spread half of almond paste mixture within 1/2 inch of edges; sprinkle with 1 cup of chopped cranberries. Brush long edges of dough with water. Starting with opposite long edge roll up dough jellyroll style. Pinch seam together to seal.

Cut two 1 inch wide pieces from each end of the roll; set aside. Shape roll with seam side down into ring on 1 baking sheet; press end together to seal. 


Using scissors or serrated knife, cut about 3/4 through outer edge every 1 inch all around ring. 


Twist each cut piece slightly to expose swirl inside roll. 


Cut reserved dough end in half to make 4 slices. Set 1 slice in center of ring; arrange remaining 3 cut side to over center slice. 

Cover, let rise until doubled in bulk, 45 minutes. 

Repeat with remaining dough to make second tea Ring.


Step. 4 Bake and Ice

Preheat oven to 359°F. 

Beat 1 egg with 1 TBS. water. Brush each ring with egg wash; sprinkle each with 1 TBS. almonds.

Bake 30-35 minutes or until golden. Cover edges with foil of browning too quickly. Cool on rack 10 minutes. Remove from pans. Mix powdered sugar, almond extract, and enough milk (start with 1 TBS.) to make pourable. Drizzle over each ring.


Tuesday, December 21, 2021

Spritz Butter Cookies With Wilson Cookie Press


Spritz Butter Cookies Recipe

1 1/2 cup Butter, softened
1 cup Sugar
1 Egg
2 TBS. Milk
1 tsp. Vanilla Extract
1/2 tsp. Almond Extract
3 1/2 cups Flour
1 tsp. Baking Powder

Preheat oven to 350° F.

In medium bowl, combine flour and baking powder.

In large bowl, beat butter and sugar with electric mixer until light and fluffy. Add egg, milk, and extracts. Add flour mixture; mix well.

Fill cookie press with dough and fit with desired plates; press cookies onto ungreased cookie sheets.

Bake 10-12 minutes or until edges are light golden brown. Cool 2 minutes on cookie sheet; remove to cooking rack and cool completely.

Makes about 7-8 dozen.

Tip: Do not refrigerate the dough before using the cookie press. The dough needs to be soft to squeeze through the press.


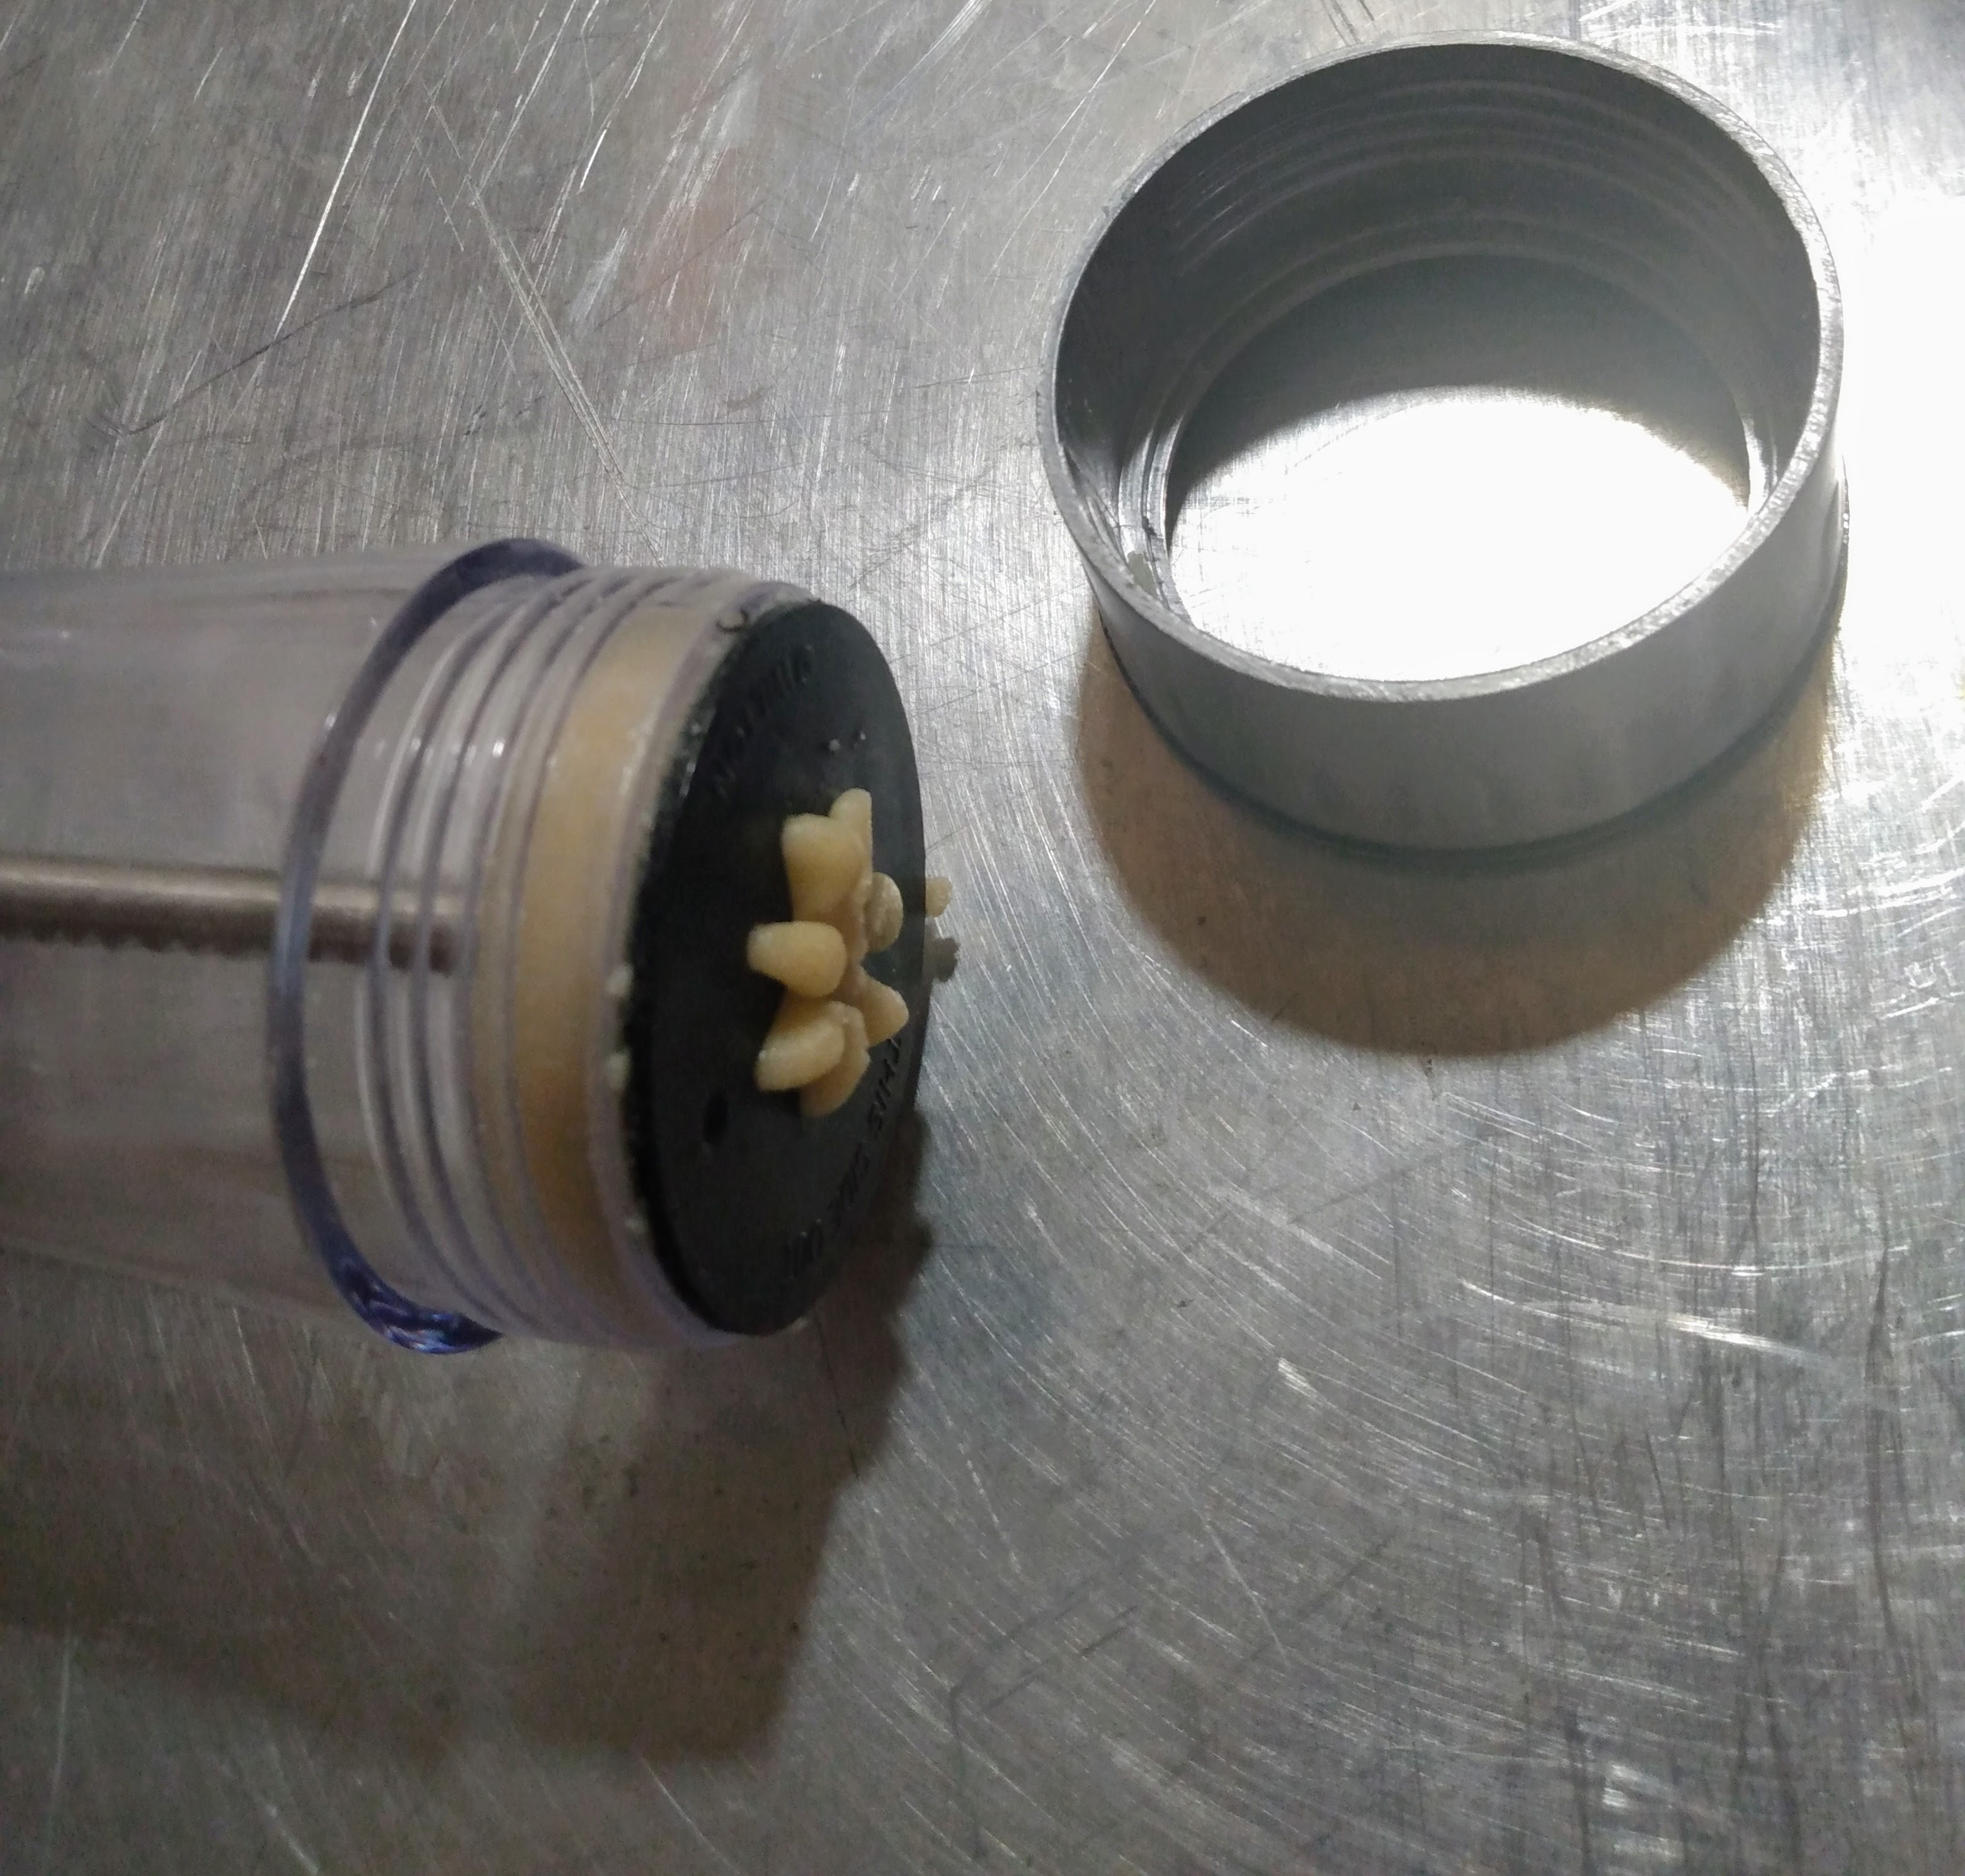
This cookie press is a great tool for making butter cookies. 

It is so easy to use: 

Load with batter.


Place in position.


Squeeze the trigger.


Lift.


Ta da!


It is also easy to change cookie shape plates.


Unscrew the collar. And remove the plate that you want to replace.


Select a new cookie shape plate. Put it into place with the correct side facing out, as indicated on the plate.


Screw the collar back on and load the press with more cookie dough.


I really like my cookie press. Mr. In the Mid-west bought in for me several years ago. 


I used to keep a container of these Spritz cookies on hand in the freezer back when I was a, "Cookie Jar Mama." I wrote a blog post about it at the time. You can read the post about that era HERE. Memories..... :)

Do you have a cookie press?

Do you like Spritz Butter Cookies?

Let me know in the comments section!

Tuesday, August 31, 2021

Sweet-N-Sour Chicken Recipe!

 I posted this recipe several years ago. I gave the post a title that made the recipe hard to find, though. I still use and love this recipe. So, I think now is a good time to re-publish the tasty Sweet-N-Sour Chicken Recipe.


    Chicken:
  • 2 lbs. Chicken, skinless chicken thighs(preferably), or breasts
  • 1 cup cornstarch
  • 2 large eggs, beaten
  • 1 1/2 - 2 cups frying oil
  • Sauce:
  • 3/4 cup granulated sugar
  • 4 tablespoons ketchup
  • 1/2 cup apple cider vinegar
  • 1 tablespoon soy sauce
  • 1 teaspoon garlic salt
Directions
  1. Preheat the oven to 325 degrees F.
  2. Cut the chicken breasts into 1-inch pieces.  Place the cornstarch in a gallon-sized ziploc bag. Put the chicken into the bag with the cornstarch and seal, tossing to coat the chicken.                                           Or, put the corn starch and chicken pieces into a lidded container and shake vigorously to coat all the chicken.
  3. Whisk the eggs together in a shallow pie plate. Heat the oil in a large skillet over medium heat until very hot and rippling. Dip the cornstarch-coated chicken pieces in the egg and place them carefully in a single layer in the hot skillet.
  4. Cook for 20-30 seconds on each side until the crust is golden but the chicken is not all the way cooked through (this is where it's really important to have a hot skillet/oil). Place the chicken pieces in a single layer in a 9X13-inch baking dish and repeat with the remaining chicken pieces.
  5. Mix the sauce ingredients together in a medium bowl and pour over the chicken. Bake for one hour, turning the chicken once or twice while cooking to coat evenly with sauce. Serve over hot, steamed rice.


I have frozen this meal. This is how I did that.

To Freeze:

Complete steps 2-4. Drain and cool the par-fried chicken pieces. Freeze the chicken in a bag.

When ready to bake:

Put the frozen par-fried chicken pieces into casserole pan. Pour sauce over the chicken pieces and stir to coat.

Bake at 350° F. for 1 hour, stirring twice during the baking time.


Tuesday, August 10, 2021

Tropical Fruit Whip!

 This recipe is inspired by the Pineapple Whip recipe from Dinning On A Dime .com. 

Ingredients:

Frozen Bananas

Frozen Pineapple, fresh or canned

Canned Coconut milk

Vanilla Extract


A tip for those using canned pineapple: freeze it in an ice cube tray. This will make it easy to blend up.


I have only tried this recipe with canned pineapple. I think it would be much better with fresh pineapple, though. I can taste the "tinny" flavor from the tin can of the canned pineapple. 

These are rough quantities. Please adjust the amounts to your preferences!


Tropical Fruit Whip

Yield: 4 large servings

1 (13.5oz.) can coconut milk

1 (20oz.) can pineapple chunks, frozen

2 1/2 cups banana chunks, frozen

2 teaspoons vanilla flavoring (I really like Mexican style vanilla flavoring in this shake.)

Place all ingredients into a blender and blend until really smooth and somewhat aerated.

Serve cold. 

Enjoy!


Tuesday, July 13, 2021

Baby Is Coming Ready Or Not!

 This week I have been working on somethings for when the baby comes. 

We have a month until the baby is due. We do home births. There is a list of items that we are supposed to have ready a month in advance. I have almost everything gathered. An important thing that I am still missing is new born baby clothes! But, I have time..... :)

Home birth supplies

I made a batch of tamales this week. I froze the extras to have a couple tamale meals when the baby comes.  I used this RECIPE. I have learned a few things about using dried chili's from watching Rick Bayless' video classes on YouTube. I implemented some of his instructions for taking the seeds out and toasting the dried peppers before hydrating them.

Tamale assembly

They are really good when used like this. I have used dried chili's to make sauce for tacos now that I know how to use them in the right way. 

I was able to freeze two bags of tamales with 15 tamales in each bag.

Tamales cooked and ready to freeze

I made and froze some gluten free corn biscuits just in case my Mom brings some chocolate gravy when she comes to see the baby. *wink* *wink* (have I mentioned that my Mom reads this blog?)

Corn biscuits


I had a freezer full of chicken bones, not literally, but you understand my point. Most of the bones came from de-boning split chicken breast. While I was doing some baking this week I put the bones in the oven to roast. 

Roasted chicken bones

Roasted bones lend a lot more flavor when used to make broth than non-roasted bones.

Now I have a freezer full of chicken broth! Mmmmm. A week ago we had sore throats and I was able to pull out some frozen chicken broth that I had made previously and heat it to drink. Warm chicken broth is so soothing! I like having some on hand.

 Proverbs 10:4

He becometh poor that dealeth with a slack hand: but the hand of the diligent maketh rich.


I hope everyone has a good week! 

Tuesday, May 4, 2021

Lumpia Recipe

Our Pastor has raved about Lumpia after he has come home from different trips to the Philippines. He said they are like egg rolls and they are served with a delicious, sweet, chili sauce. 

I decided to give Lumpia a try. I looked online for recipes. I came across this one by Philip Lemoine, a man in Hawaii who's Mom came from the Philippines.

The thing that sold me on this recipe was this note at the bottom of the ingredient quantities, 

"This is PLENTY of garlic and you do not need to double this like we all do when we see garlic in a recipe."

Yes! "We" always double garlic in recipes! :)

 And with that feeling of camaraderie I purchased the ingredients and made a jumbo batch of Lumpia.


In the video recipe he mentions the special sweet chili sauce. I found the same brand of sweet chili sauce at the Chinese Grocery Store. Our Pastor confirmed that the Mae Ploy sauce was the same brand that he had been served while he was in the Philippines.


Lumpia Recipe 

2 lbs. Ground Pork
2 lbs. 80/20 Ground Beef
2 eggs 
4 oz. Soy Sauce
10 oz. Minced Carrots
16 oz. Minced Onions
3.5 oz. Minced Garlic
1 TBS. Black Pepper
Salt to taste (1 1/2 tsp.)
80 to 100 Lumpia Wrappers, Thawed
Egg Wash

Mince the vegetables in a food processor. 
Combine all the ingredients, (except for the Lumpia Wrappers and Egg Wash),  in a large bowl.
Mix thoroughly with your hands.
Peel apart all the Lumpia Wrappers and put in a plastic bag to keep from drying out.
Use a 1 oz. ice cream or cookie scoop to portion the filling for each wrapper.
To wrap Lumpia:
Place a wrapper in front of you on a diagonal. Put a scoop of filling slightly off center on the wrapper.

Fold the bottom corner, snuggly, up over the filling.

Fold both of the side corners toward the center.

Dip your finger into the Egg Wash and "paint" it onto the top flap.

Roll the Lumpia up.


Place the Lumpia on sheet pan and freeze over night.
Remove from sheet pan and place in plastic bag for storage. 
To fry:
Heat 3-4 inches of frying oil to 375° F. 
Put frozen Lumpia into hot oil. Do not over crowd the pan. 
Fry until golden brown, 6-8 minutes.
Serve with Mae Ploy Sweet Chili Sauce.

Tuesday, September 29, 2020

Paw Paw Fruit!


Our Paw Paw harvest.
 

Paw Paw trees are native to North America. I have gathered from what I have read that they grow from New York to the Great Plains and as far South as Tennessee. Fun fact: Paw Paw's are the largest, tree fruit, native to the North American continent.

Paw Paw grove.


Paw Paw trees are not very large trees. They grow in the understory of forested areas. They grow in groves, from what I have seen. They are always grouped together.

Paw Paw leaves.


The Paw Paw tree has large leaves. They are similar in shape to Hickory tree leaves. The way to tell them apart is that Paw Paw leaves are smooth around the edges and Hickory leaves have a fine tooth, serrated edge.

Paw Paw fruit growing on a tree in July.


Paw Paw trees have to be 7 or 8 years old to bear fruit. Paw Paw trees have not been grown commercially because the fruits are too perishable to survive shipping. They are ripe for 2 or 3 days and past that point they spoil. The best way to preserve the fruit is to freeze the pulp.


I have only had the pleasure of tasting Paw Paw Fruit once, before this year. It was back when I was a teenager. This year I found a Paw Paw grove at a park close to where we live. I was very excited to be able to try Paw Paw's again! Paw Paw's ripen from August to September. Last week we went to gather some fruit.


Paw Paw's smell very tropical. Very similar to a fresh, ripe pineapple. The skin is green. Inside, the flesh is bright yellow. There are several large, bean shaped, seeds. The flesh is soft and scoop-able. The taste is quite sweet and a little bit like a mango and an American Persimmon.


I wanted to use our Paw Paw's in a recipe so I did some searching online. I tried this recipe for Paw Paw Ice Cream. The results were great. The Paw Paw flavor came through bright and clear.


Paw Paw Ice Cream

1 1/2 cups of Paw Paw fruit puree

2 cups milk

2 cups cream

1 scant cup sugar

5 egg yolks

1 1/2 tsp. Vanilla extract


In a sauce pan heat milk, cream, and sugar until it starts to steam. Temper the egg yolks with the hot cream. Pour tempered eggs into the sauce pan and heat until slightly thickened. Remove from heat. Add Paw Paw puree and vanilla extract. Chill and then freeze in ice cream maker. I didn't have an ice cream maker so I just put it in a bowl in the freezer and took in out to mix every 30 minutes, or there about, until in was frozen to the right consistency.


Have you heard of Paw Paw's before? Have you ever tried them? Let me known in the comment section!