Two ways to eat fresh onions and garlic
Why eat fresh garlic and onions? These bulbs contain a component called Allicin among other health promoting components. Allicin inhibits the reproduction of bacteria and viruses. I don't know all the science, but you can read more HERE on Herbazest.com.
Whenever I am fighting a bacterial or viral infection I try to consume as much garlic as possible.
Most of the time I straight up eat garlic cloves. But, eating garlic can be way more pleasurable.
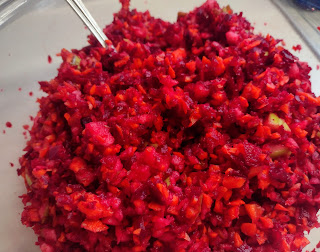
For onions try this Tomato Onion Salad.

Mix together with salt, pepper, basil, a couple tablespoons of mayonnaise and as much apple cider vinegar as you like (2ish Tbsp. for me).
This salad was so delicious that last time I was sick I was eating this salad twice a day. That makes 1 whole onion a day! I think that it did me a lot of good and it was real food as medicine.


 Top with a fried eggs and chopped cilantro.
 And, for a added boost for flavor and health promoting capsaicin, add Tabasco sauce or your favorite hot pepper sauce.
 There you have it! Two ways to make food your medicine by utilizing the flavors of fresh onions and garlic!

I love garlic! There are many ways that I get fresh garlic into my diet. I've made a garlic and oil emulsion as a salad dressing. That is a good way to get a few fresh garlic cloves with a meal. My family has a tradition of making what we call Garlic Salad, which is a garlic spread made from cooked eggplant pulp, bread crumbs, olive oil, vinegar, and salt. It is similar to the Lebanese dish; Baba Ganu. I quit adding the bread crumbs and I like it much better that way. (I never told my Grandma.Shhh)
One of my favorite ways to eat fresh garlic in a meal is a variation of Huevos Rancheros.
I mix 3-4 cloves of minced garlic with a couple ounces of cream cheese.

Spread the cream cheese mixture onto toasted corn tortillas.


I hope you enjoy!
Let me know if you have tried any of these before or how you use food as your medicine!
Psalms 104:14
He causeth the grass to grow for the cattle,
and herb for the service of man:
that he may bring forth food out of the earth;