Showing posts with label Laundry. Show all posts

Monday, March 27, 2023

Have I Found The Key To Laundry?


Am I so presumptuous to claim that I have found the key to the looming task that is LAUNDRY? Du...Du....Dah... (Dramatic music)

Perhaps not everyone loathes laundry as much as I do. (as much as I did) I used to say many times a week, "I hate laundry. I hate folding clothes!" 

It dawned on me in back in December that chanting, "I hate laundry. I hate folding clothes!" probably wasn't a healthy habit. I was reenforcing and entrenching a pathway of thinking that was unhelpful to me. The more I said it the more it became true.

My Grandma told a story of how that when she was a little girl she hated Ox Tail Soup. She had the poor judgment to say out loud how much she hated Ox Tail Soup when it was served to her one supper time. Her Daddy said, "There are staving children around the world who would be happy to eat Ox Tail Soup." She had a smart alec retort: "Well then send it to them!" Her Daddy made her say, "I love Ox Tail Soup." every time she took a bite. And every time Ox Tail Soup was served she had to say, "I love Ox Tail Soup." And Ox Tail Soup became her favorite soup. Right up to old age she said Ox Tail Soup was one of her favorites.

I experienced something similar with eating tomatoes. When I was a girl I hated tomatoes. They made my stomach turn. When that slimy gel surrounding the seeds in a tomato hit my tongue it made me gag and want to puke. They were acidic gross little fruits not meant for human consumption in my opinion. When I was 10 I decided that I was too old to be a picky eater anymore. I made a resolution to like tomatoes. My rule for myself was that every time tomatoes were available I would take one on my plate and eat it. Cherry tomatoes in salads and vegetable trays, sliced tomatoes on sandwiches and just as a side I now took every opportunity to eat. Before long I got accustomed to the texture and flavor and eventually learned to like tomatoes. Today I love tomatoes!


These stories testify that you can change your feelings towards things. Your mind is in control of your feelings. 

The Psalms show this too. How often does the psalmist say, 

"I will rejoice," 

"I will praise," 

"I will declare," 

"I will not fear," 

"I will offer," 

"I will sing," 

"I will arise," 

"I will be glad," 

"I will give thanks," 

"I will trust,"

"I will hope,"

.......?

There is no mention of being filled with joy prior to the declaration, "I will rejoice." The goodness of God is the only fact that precedes this rejoicing, or gladness, or praise, or trust, or hope. No feelings are mentioned, only a declaration of an action that the psalmist will take: 

"I will rejoice."

"I will praise."

"I will declare."

"I will not fear."

"I will offer."

"I will sing."

"I will arise."

"I will be glad."

"I will give thanks."

"I will trust."

"I will hope."


I was in the midst of a smoldering depression one time when I read Psalm 28:7

"The LORD is my strength and my shield; my heart trusted in him, and I am helped: therefore my heart greatly rejoiceth; and with my song will I praise him."

And I thought, "I can't rejoice." "I can't praise." This verse is not for me now.

Then I read Psalm 70:4

"Let all those that seek thee rejoice and be glad in thee: and let such as love thy salvation say continually, Let God be magnified."

I began to realize the ball was in my court. It was up to me to rejoice. It was up to me to change my feelings. One of the key factors to changing your feelings, based on these and other verses, seems to be changing your words.

Now we are getting back around to the laundry topic...... My feelings towards laundry needed to change. To rephrase that, I needed to change my feelings towards my job of laundry. I decided to start with the words coming out of my mouth. I made two rules: 1) no saying, "I hate laundry," and 2) everytime I fold a piece of laundry I would say, "I love folding (insert child's name) pants." "I love folding so and so's shirts." And so on and so forth.

Everytime I say, "I love folding Mr. In The Mid-west's t-shirts," or, "I love folding the baby's onesies," my heart warms a little. A surge of satisfaction with my own work wells up inside of me. I hear my family members names and I am reminded of how much I love each of them. I am forced to recognize what a rich life I am blessed to be living. Slowly, I am learning to like folding laundry. Forbidding spoken complaints and instead requiring spoken gratitude has led my feelings. I am changing my mind by changing my language. And that is the key to laundry for me. I have been able to conquer the laundry mountain and keep it in check since implementing this technique. This is a huge victory for me! Perhaps you will be intrigued to give this method a try in any areas that you are struggling to overcome.

Proverbs 15:23
A man hath joy by the answer of his mouth:
 and a word spoken in due season, 
how good is it! 

Tuesday, March 1, 2022

How To Sew On A Button And Add A Shank


This is how you sew on a button and make a shank with the thread. 

The trick is to use a darning needle to hold space.
You could also use a toothpick or something of that diameter.
Adding a shank makes the buttons easier to manipulate and put through the button holes.

Double the thread on your needle. Place the darning needle across the top of the button.
Stitch three stitches through each set of holes in the button going over the darning needle.
The last time you make a stitch direct the needle out under the button, 
between the button and the garment 
Pull the darning needle out from under the stitches.
The loops of thread will be loose.
Take the needle and thread and twist it around the button.
Go around 3 to 4 times. 
Now there is a shank on your button!
It is hard to see in the picture, but the shank allows
 for some space between your garment and the button itself.
Shanks make it easier to button and unbutton closers.
After creating the shank, 
push your needle through to the back side of the garment
 and tie off as you normally would.
Tada! Ready to wear! :)

Tuesday, May 11, 2021

How To Fold A Flat Diaper

 I have been cloth diapering my one year old for the past month or so. Lately I have spent a lot of time washing and folding cloth diapers.

Flat diapers on the clothes line.

My favorite cloth diaper method has been to use flats or prefolds with water proof covers. And between the two, (flats and prefolds), I prefer flats. 

Here is how to fold a flat diaper.

Lay the diaper out in front of you.

Fold the right side toward the center.
Eye balling it,
Fold the right edge just a few inches past
the center line.

Fold the left side towards the center.
Again,
fold the edge just past the center point.
You want the fabric in the middle to
over lap by 3-4 inches.

Fold the lower edge up towards the middle.

You want to fold the lower edge up more
for smaller babies and less for 
larger babies. This adjusts the size of 
the diaper for the size of the baby.

Fold the right third over the middle.

Fold the left third over the middle.
I like to tuck the left flap into the pocket created by folded down bit 
on the right side. 


Ta-da! The diaper is ready to be used!

To put the diaper on a baby:
Open the flaps at the top, this will
be the back of the diaper.

Position the baby on the diaper.

Pull the front portion of the diaper,
the part with the extra absorbancy,
up between the baby's legs.


Pin the back corner, on one side,
 to the front of the diaper.
Careful, don't poke the baby!


Pin the back corner, on the other side,
to the front of the diaper.


And that is a wrap!
Let me know if you cloth diaper or if you would like to see more posts about cloth diapering!


Tuesday, August 11, 2020

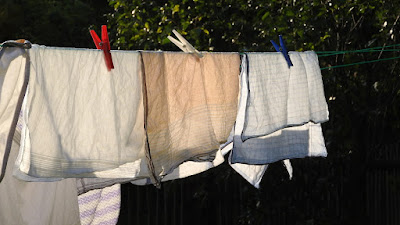
I Am Happy To Have A Clothesline!

Mr. In The Mid-west put a clothesline up for me this year!

I have been thoroughly enjoying it! I love being outside. I love hearing the birds sing. I love the sunshine soaking through me. And I can experience all of these wonders now while I do my least favorite chore, laundry. I think it may be my most favorite chore now, at least during the summer months! :)

Do you like using a clothesline? 

Sunday, February 18, 2018

New Baby Coming.....

A box of freshly folded diapers.

I can't wait to use these on our new baby! We recently found the boxes of baby clothes and diapers, in preparation for our coming Addition. :) We have less than two weeks until our due date!

I spent time yesterday boiling all my cloth diapers and getting them ready for Baby. I am really excited to be using them again! :)

Friday, April 14, 2017

Cloth Pad Cleaning And Care

{Buy My Cloth Pad Pattern HERE.}

Storage:

I just keep my cloth pads in the bottom drawer of my bathroom vanity.


You can store your cloth pads wherever you would normally store your disposable pads.

Soiled Pads:


When you remove a soiled pad fold it in half and use the snap to fasten so that it stays closed.

Do NOT put soiled Pads in a bucket of water. You will have mold and mildew problems.

You need to have a bin, or tub, or bucket, or some type of dry container to collect your soiled pads in until wash day. I use a mop bucket, because it is convenient for me.


A very cute and somewhat discreet option is to use a 'wet bag.'   You could stow it below your sink or hang it on a hook it the bathroom.

The term 'wet bag' comes from the cloth diapering community, I think. It was originally a waterproof cloth bag that you carried in your diaper bag and used to put soiled diapers into while you were away from home.

You can purchase wet bags from companies that market them for cloth pad users like Glad Rags or from companies that are marketing more for cloth diapers like Kelly's Closet. You can find them on Amazon too. Just do a Google search they're everywhere. There are many unique and homemade wet bags on Etsy, like the one below. Click here for link. (NOT an affiliate link)

The afore mentioned businesses also carry small travel size wet bags with two zippered compartments. These are great for carrying in your purse. You can use one zippered compartment for clean pads and one zippered compartment for dirty pads.

Please don't get the idea that when you take a soiled cloth pad off it must be put into some waterproof container because it is so messy and it might drip or something like that. That is just not true. The very center of the pad is usually the only dirty part, and it is not sloppy or oosing all-over the place. Once you fold the pad in half and button it the blood isn't going anywhere. I have been known to put folded and fastened soiled pads straight into my purse just like that to transport home without any trouble.

Cleaning:

I have enough pads that I can wait for my period to be over to wash all my pads at one time. If you don't have enough pads to last your entire period you will need to wash them and reuse them.

The washing method I am going to describe is the way that I wash my cloth pads. There are a lot of ways you could go about washing your pads. I have been pretty successful at keeping my pads relatively stain free with this method. After as many cycles as I have used my pads for there is bound to be at least some shadow stains.

Soak #1:


On wash day, I un-snap all my pads and lay them flat in a 2 1/2 gallon bucket. I run COLD water in the bucket until all the pads are submerged. It is important to use COLD water. Hot water will set protein stains, like blood.

I add 1/4 scoop of powdered hydrogen peroxide cleaner (I use Dollar General's generic brand of a product similar to Oxyclean). Mix pads and cleaner around a little bit to dissolve and distribute the powdered hydrogen peroxide.

Let pads soak for a few hours (3-4 hours usually). I am not going to lie, the water gets really dark. You want all of the blood to rinse out of the pads, and this first soak really reminds you that that is what's going on.

Drain the water. Squeeze the water out of the pads. When I squeeze the water out of my pads I never wring them or twist them. I feel like wringing them out will be to tough on the materials. Maybe I feel that way because I made them myself and I would hate to see them fall apart.  :)

If you have a waterproof PUL layer in your pads you definitely don't want to wring them or twist them. That could damage the PUL.

Rinse:


Put them back into the bucket and fill with COLD water. Swish around, drain, squeeze, and repeat until rinse water runs clear. I usually do this twice.

Soak #2:


Before I soak the pads the second time I rub Fels-Naptha soap onto any stubborn stains.


I don't spend much time stain treating. I just rub the soap on there and throw it back in the bucket.


I use a 1/4 scoop of powdered hydrogen peroxide cleaner, again, and fill the bucket with cold water, again.

This second soak only takes 1-2 hours.

Drain, and squeeze the water out of the pads.

Washing:

You can wash your pads in a regular load of laundry.

I just wash my mine in whatever load of laundry is ready to wash. I don't worry much about the water temperature at this point in the cleaning process.

Do NOT add softener or dryer sheets to loads of laundry containing your cloth pads. Softener can reduce the absorbability of your pads.

Drying:


You can tumble dry or hang dry your cloth pads.

If you have a waterproof PUL layer in your pads it is best not to dry them on high heat. The heat can damage the PUL.

When your pads are dry store them in their normal place. Don't forget to keep one (or two) in your hand bag: purse, baby bag, back pack, etc...

Miscellaneous:

How many cloth pads do you need? The answer depends on what your periods are like and your personal preference.

I have 22 pads in my stash: 2 very heavy/overnight pads, and 20 medium to heavy absorbency pads in various sizes.

I don't have very heavy periods and I rarely go through all my pads.

Some women find that they use more cloth pads than they would disposable pads because they change them more frequently. With cloth pads you don't have to worry about 'using them up,' 'running out,' or 'wasting' any. You can change them as often as you feel like it.

Some women use less cloth pads than they would disposable pads because their periods lighten up after they switch to cloth. This doesn't happen for everyone, but I have heard of it happening for more then one woman.

The chemicals in disposable pads could play a role in why some women have lighter, less painful, periods when they switch to cloth pads. You have to consider how sensitive the tissues exposed to the bleaching and sanitizing chemicals in disposable feminine products are. They are quite sensitive and may not tolerate all those chemicals very well.

That concludes my series on cloth pads! I hope that it has been informative and educational. If you have any questions please leave a comment and I will do my best to answer them. :)


Wednesday, April 12, 2017

A Word On Absorbency

{Buy My Cloth Pad Pattern HERE.}


I did an absorbency test with 2 samples of cotton flannel.

This test demonstrates the difference in absorbency between high quality flannel and low quality flannel.

I put 4 layers of flannel down on a piece of fleece and then I placed an average topper material over top.


Then I poured 2 tablespoons of water on the fabric. I let it set undisturbed for 1 minute to allow the water to soak in.

This is what I found on with the cheap cotton flannel:
The water soaked through all 4 layers.

This was cheap cotton flannel from a pair of Faded Glory brand (Walmart's generic) pajama pants.

This is how the high quality flannel preformed:
The water only soaked through 2 layers of the high quality flannel.

I used the same amount of water (it was the same temperature, too) and let it set for 1 minute, undisturbed.

The high quality flannel was from a JC Penney brand cotton flannel pillow case.

I could tell that the JC Penney flannel would be more absorbent just by feeling it. It was very thick and lush. The Faded Glory flannel was much thinner and lighter.

The cheap flannel can still be used to make good cloth pads. Knowing that it is less absorbent is very important, though, because you will have to use more layers to achieve the right absorbency. Or, you could do what I did, and combine some high quality flannel and low quality flannel and use them together in a pad.

Here is the general rule of thumb for how many layers to use:
(The smaller number would be for high quality flannel and the larger number would be for less absorbent flannel. )

1-2 layers of flannel = light absorbency
2-3 layers of flannel = medium absorbency
3-4 layers of flannel = heavy absorbency
4-5 layers of flannel = postpartum absorbency

These numbers are just a general rule of thumb. I recommend that you get to know the materials that you are working with and use your senses to determine how many layers of flannel you should use.


Another thing to keep in mind is that flannel's peak absorbency is reached after multiple washings and dryings. If you are using new flannel fabric it may not be as absorbent, yet, as flannel fabric that has been washed and dried countless times.

I want to also add, that you should not be using softener on your cloth pads or the material you will be making your cloth pads out of. Softener will make your fabrics less absorbent and possibly make them water repellent.

Tuesday, December 9, 2014

How I Make Laundry Detergent


Ingredients:


Grate Soap:


Measure:


Stir:


Homemade Laundry Detergent

1 bar Fels Naptha (5.5 oz.) soap

1 1/2 cups Washing Soda

1 1/2 cups Borax


Grate the bar of soap; mix with 2 quarts of water and slowly heat until the soap is dissolved, stirring occasionally. In a 5 gallon bucket put the washing soda and borax; stir in some hot water until the powders dissolve. Pour the dissolved Fels Naptha soap into the 5 gallon bucket. Fill the bucket up with warm water. Stir well. Use 1/2 cup in each load of laundry.

This is really cheap and it works well!