Showing posts with label Sourdough. Show all posts

Monday, May 1, 2023

Sandwich Loaf Sourdough Bread Recipe


This recipe includes oatmeal for a really flexible moist bread loaf that can be thinly sliced for sandwiches. It is my favorite bread to make now that I have an active sourdough starter again. My whole family devours these loaves so quickly, which is why I make a two loaf recipe.


Oaty Sourdough Sandwich Bread

2 cups boiling water

1 cup oatmeal (old fashioned or quick oats)

1/4 cup butter

1/4 cup molasses

2 tsp. salt

2 cups active sourdough starter (mine is whole wheat)

2 1/2 cups whole wheat flour

2 1/2 - 3 cups all purpose flour

In the bowl of a stand mixer: pour the boiling water over 1 cup of oats and let sit 5 minutes. 

Add butter, molasses, and salt.

Wait until the mixture cools sufficiently so as not to kill the yeast. You want the temperature to come down below 120°F.

Stir in the 2 cups of sourdough starter. 

Add both types of flour and mix for 5 minutes on low speed.

Rest 15 minutes.

Knead for 5 minutes by machine.

Form into ball, cover, and rise in a warm draft free place 2-4 hours. (2 hours at warmer temperatures and 4 hours at cooler temperatures.)

Grease 2 loaf pans. Shape dough and raise in loaf pans for 2-4 hours until nearly doubled in size.

Preheat oven to 400°F. Place a large roaster pan in the oven while it is preheating on a shelf below where the bread will bake.

When rise is complete slit the top of each loaf with a bread knife.

Use a steam baking technique by adding 1 1/2 cups of water into the hot roaster pan as soon as the bread is placed in the oven to bake. Close the oven door at once to trap the steam. Bake at 400° F. for 35 minutes.

Remove to wire racks to cool.

Slice and enjoy!


Matthew 6:11 
Give us this day our daily bread. 


Monday, April 17, 2023

Starting Sourdough!


I am so excited to start sourdough again. It has been many years since I let my sourdough starter die. I am looking forward to using a starter for bread baking again! It is so much fun!

For anyone who is curious about how to start a sourdough starter, this is the method I used.
Equal parts of flour and water are mixed together. It is important to use water the doesn't have any chlorine in it.
I am going to find some rye flour to feed the starter. In the past I have always been much happier with the activity and flavor from a rye flour starter. I looked for rye flour when I was out shopping at Walmart, but they don't carry rye flour at my Walmart. Isn't that just like Walmart? Their selection is so poor.
It the mean time I am using whole wheat flour.
Leave the mixture at room temperature with a permeable lid like a coffee filter or cheese cloth.

Everyday the equal parts flour and water have to be equivalent to the aged flour and water mixture.
Example: The aged flour and water mixture is equal to a 1/4 cup. Add a 1/4 cup flour and a 1/4 cup water. 
Everyday the mixture will double in size. I started with only 1 tsp. of flour and water so that my mixture wouldn't get out of had too quickly, doubling every day.
When my mixture reached 1 cup in volume I dumped out 3/4 of it to reduce the size. I had to do this about every other day. I did not throw this discarded portion away. I mixed it into pancake batter or bread dough.
This mark shows the starter right after feeding.

After two weeks of feeding I was begining to see a good amount of activity in my starter. You can see by the marks on the jar how much it rose after 8 hours and then 10 hours. The peak rise happened at 10 hours and then it began to deflate.


This mark shows how much it grew in 8 hours.
I am pretty excited with this amount of growth. I have been using my starter to make my Multi grain Sourdough bread and it rises superbly! I am so happy with my starter. Everyone in my family likes this bread. It makes good sandwiches; peanut butter and jelly, grilled cheese, and lunch meat. The sour flavor is not over powering with this recipe.

My starter peaked at 10 hours.
 It nearly doubled in size from the wild yeast!

I have enjoyed the process of starting a sourdough starter from scratch. It took about 3 weeks for my starter to fully develop enough yeast to rise bread really well. If you've ever wanted to try doing this yourself I hope I have encouraged you to go ahead and try! It is not anything to be intimidated by and it can be a lot of fun!

Tuesday, April 13, 2021

Visit To The Indian Grocery Store!


We have discovered an Indian Grocery Store close by to where we live. The Tikka Masala Recipe is the reason I had originally looked for an Indian Grocery Store in our area. I needed Garam Masala, a spice blend that I could not find at a typical grocery store.

There are so many interesting things at the Indian Grocery Store. Most of which, I have never seen before, and have no idea how to use or cook. I need someone to help me get started.

That "Someone," so far, has been the Owner of the store. Mr. In the Mid-west started up a conversation with the Owner one day when we were in his store. Once he heard that I eat gluten free he was showing us all around the store to many kinds of non wheat flours and products that are used in traditional Indian cooking. 


We bought a bucket of Dosa batter from the refrigerated section. The Owner Gentleman said it was for making pancakes. I read up on how to cook Dosa on the internet once we were at home. 

Dosa batter is a thin, fermented batter made from rice and lentils. You make pancakes out of it much in the same way you would cook a crepe. The batter bubbles up, kind of like a foam, once it hits the hot skillet. You use the back of a ladle to spread the batter in a circular motion starting in the center and spiraling out to the edge.

 The flavor is very much like real sourdough. I enjoyed the Dosa very much and so did our boys. You have to really like sourdough flavor to think that Dosa tastes good. Mr. in the Mid-west was not a big fan. :)


Their spice section is amazing at the Indian Grocery store! None of the prices were marked. I was very surprised at the checkout counter with how cheap the spices were ringing up. All the spices in the picture above cost about $12! That is nearly 50¢ per ounce. Compare that price to this little tin of Ground Ginger from Kroger: it cost over $3.00 for 1.5 ounces.


Not only are the prices of spices low at the Indian Grocery store, they have a huge selection! 


Another neat thing we have tried from the Indian Grocery store is coffee. The Owner Gentleman spoke with Mr. In the Mid-west about a few different coffee varieties. Some of the coffee selections were blended with chicory root. We picked out one that is 53% coffee and 47% chicory. 

Reading the brewing directions on the back of the package make me think that this coffee is used kind of like espresso. 

For one serving it calls for about 1/4 cup (50ml.)  of boiling water and 2 tsp. of coffee grounds. The coffee grounds are to be steeped 15 minutes and then strained and drank with milk. 

I don't have a French press to properly strain the coffee. But I do have a fine mesh tea strainer that has been working well. 

I heat some milk and foam it with a whisk before adding the coffee to the mug. I put about half and half, coffee to foamed milk.


I generally think coffee is nasty, but this kind of coffee is a real treat! With it being half warm, foamed milk it is not very strong. I can enjoy coffee fixed like this. :)

Do any of you know anything about Indian food? I am going to be learning all that I can.

If I find any good recipes I will share them here on my blog with you all!

Thursday, September 14, 2017

Story And Cloud "Bread" Recipe | Gluten Free, Grain Free, And Very Low Carbs

This bread has given me a sandwich experience back!


I did a very restrictive elimination diet for six months, for health reasons. When I started to re-introduce foods again I had a bad response to wheat and wheat products. I tried several times and each time I had terrible stomach pains within a few hours. It was so bad that I decided I would not eat wheat any more. The short pleasure of cake or bread was not worth the amount of pain I would have in the next hours.

I even tried eating properly prepared sourdough, the kind with only wild caught airborne yeast. I thought that process would make the wheat easier to digest. It gave me just as much pain as the other wheat products.

For the unforeseeable future cinnamon rolls, fresh yeast bread, real pizza, and normal sandwiches are just going to exist in the form of memories for me. I have still been baking breads, and the aromas are quite satisfying, even if I must resist tasting.

I was relating this development to a lady a church. She asked if I had tried Cloud Bread. She said she would bring me a recipe. She had made it because she has diabetes and wanted a low carb bread, but she said it should be good for me since it has no grains of any kind.

This Cloud Bread is not a good replacement for all of the things you would use regular bread for, but one thing it does well is hold a sandwich together.

During the whole time of being on the elimination diet I never looked for bread alternatives. It really wasn't possible. All grains, seeds, nuts  and legumes were off limits, as well as, eggs and all dairy products. I did miss bread, but I didn't realize how much I missed having a sandwich.

Sandwiches are delicious! Having meat, cheese, tomato, lettuce, pickle, mayonnaise, and mustard all smashed together in one bite is delightful! I feel like a person that has lived where sandwiches don't exist and now I am trying to describe them to my fellow country-men. :)

Here is the recipe for Cloud Bread.

Cloud Bread

3 eggs, separated
1 packet of stevia (you could use 1TBS. of honey)
3 TBS. cream cheese, softened
1/4 tsp. cream of tartar

Separate eggs.
In a bowl mix yolks, cream cheese, and sweetener.
In another bowl combine egg whites and cream of tartar. Mix at high speed until stiff peaks form.
Gently fold egg whites into yolk mixture.
Grease a large cookie sheet. Spoon batter onto the cookie sheet making hamburger buns shapes.
Bake at 300°F. for about 30 minutes.
Remove from cookie sheet and cool.
Place in an airtight container and wait until the following day to eat them.
 These freeze well.

Tuesday, June 14, 2016

Multi Grain Sourdough Bread


This has turned into one of my "go to" sourdough recipes.


It makes a small loaf with a nice moist crumb. I like to use it for sandwiches.


The slices are flexible and this bread stays fresh a little longer than plain whole wheat sourdough  bread.


The dough is quite sticky and does not require hand kneading.

Without any further ado...

Multi Grain Sourdough Bread 


1 cup water
3 TBS. Steel Cut Oats

- Combine in small pot. Bring to boil, simmer 5 minutes. Remove from heat.

1 cup Rye Sourdough Starter
2 TBS. Molasses 
2 TBS. Soft Butter 
1 tsp. Salt

- Combine in a large bowl. When the oat/water combination has cooled to around 120° F. add to ingredients in the bowl and stir.

2 - 2 1/2 cups Whole Wheat Flour 

-Stir in one cup of flour and mix for a minute. Add the second cup of flour and mix for another minute.

- Cover with towel and let rest 30 minutes to allow flour to hydrate. After 30 minutes stir and add more flour 1/4 cup at a time, if needed. The dough should be sticky.

- Cover and let rise 2-4 hours. Stir dough half way through rising, this will count as kneading. Rise times will vary based on the strains of yeast in your starter and the temperature. My dough needs to rise 2-4 hours: 2 hours on hot days, 4 hours on cool days.

- Scrape dough into a greased loaf pan. (I use 9"×5" pan but an 8"×5" would be more ideal.) Cover and let rise 1-2 hours.

- Bake in a preheated 350°F. oven 30-35 minutes.

- Remove from pan and cool on wire rack. Slice when cool. Enjoy!


Saturday, January 2, 2016

Sourdough Rye Onion Caraway Seed Rolls

I am going to be linking this post with the Sourdough Surprizes blog. This the last time they are doing a monthy challenge. (sniffle)
The theme was Holiday Breads. This recipe is kind of stretch, but since it is the last linky party they will be hosting they said I could go ahead and enter. :) Isn't that sweet! I am kind of sad that they won't be doing their challenges any more, but they have a wealth of sourdough recipes in the archives. :)


This my favorite type of bread to make with my sourdough starter.

Rye Onion Caraway Seed Rolls

1 cup sourdough starter
1 cup kefir
1 medium onion, finely chopped
1 Tbs. Caraway seeds
2 Tbs. molasses
2 tsp. salt
1 egg
1 cup rye flour
2 1/2 - 3 cups whole wheat flour

In a large bowl stir together the starter, kefir, onions, Caraway seeds, molasses, and salt. 
Stir in a cup of the wheat flour and beat for a minute.
Stir the egg into the mixture.
Gradually add the rest of the wheat and rye flour.
Rest 20 minutes to allow the flour to fully hydrate.
Knead the dough for 10 minutes. The dough should be elastic. You may need to add some more wheat flour if the dough is too sticky to handle, but the dough should be fairly wet.
Cover bowl with a damp kitchen towel and place in a warm, draft free area. Allow to rise until doubled, 6-12 hours.
When risen shape into rolls and place on a greased baking sheet, a few inches apart.
Cover with towel and allow to rise, 1-2 hours.
Bake in a preheated 350* F. oven for 25-30 minutes.
Enjoy!


I really like these served warm with cream cheese. I think they are such a treat!


Thursday, August 20, 2015

Sourdough Coffee Cake


This recipe is one I came up with last summer. I am sharing it now for the Sourdough Surprises challenge of the month.  
This is a really tasty coffee cake. I could not taste any of the sourdough flavor in the finished cake, but it still has the health benefits that sourdough offers.


Sourdough Coffee Cake

1/2 c. sourdough starter
1/2 c.+2 T. kefir or buttermilk 
1 1/2 c. whole wheat flour
1/2 c. sugar
1/4 c. melted butter
1 egg
3/4 t. salt
3/4 t. baking soda

Strussel

1/2 c. sugar
1/4 c. whole wheat flour
2 t. cinnamon
3 T. melted butter

 Mix starter, buttermilk and flour. Cover, and rest overnight. 
In the morning mix together the strussel ingredients in a bowl. 
To the flour/kefir mixture add the egg, butter, sugar, and salt. Beat until the batter starts to come together and resembles cake batter.
Sprinkle baking soda over the batter and stir briefly, but, well. 
Pour 1/2 of the batter into a greased 8x8 inch pan. Sprinkle 1/2 of the strussel over the top. Pour in the remaining batter and top with the remaining strussel. 
Bake at 350* F. for 40-45 minutes. 


Tuesday, July 21, 2015

Sourdough Wontons-Link With Sourdough Surprises

I am joining the Sourdough Surprises link-up this week.

Each month they come up with a challenge for those who are interested in getting adventurous with their sourdough starters. 

This month the challenge was, wontons.

I thought it would be something fun to try.

Rolling out the wontons was the hardest part. 

I think the key to making wonton wrappers different than any other dough is to get them very thin.

I am not sure if I will try this filling recipe again. It was okay, but was lacking in flavor.

Whole Wheat Sourdough Wonton Wrappers

1 egg

1/3 cup sourdough starter

2 1/2 TBS. water

1 3/4 cups whole wheat flour

In a large bowl, combine the flour and salt. Create a well in the center of the mixture and slowly pour in the stater, egg, and water. Mix well. If the mixture is too dry, increase the amount of water one teaspoon at a time until a pliable dough has formed. On a lightly floured surface, knead the dough until elastic. Cut dough into two separate balls. Cover the balls with a damp cloth for a minimum of 10 minutes.

Cut each ball into four equal pieces. Roll the pieces into 10 1/2 by 10 1/2 inch squares. Cut each square int nine 3 1/2 by 3 1/2 inch squares.

To assemble the wontons, place a wonton wrapper flat in the palm of your hand. If frying, add 1 teaspoon of mixture to the center of the wrapper.

  Dip a finger into water, and paint all 4 edges with the water. Fold the wonton in half, corner to opposite corner to make a triangle. Seal tightly all around. Make sure there are no air pockets or holes in the wonton. Fold the longer two triangle points together and seal to make the wonton shape.

Pork Wonton Filling

1 pound ground pork 

1 tablespoon grated fresh ginger

 2 cloves garlic, finely minced

 3 stalks green onion, chopped

 2 tablespoon soy sauce 

1 tablespoons cornstarch 

2 cups finely chopped cabbage

Place the chopped cabbage into a bowl. Sprinkle generously with salt, set aside for 10 minutes. 


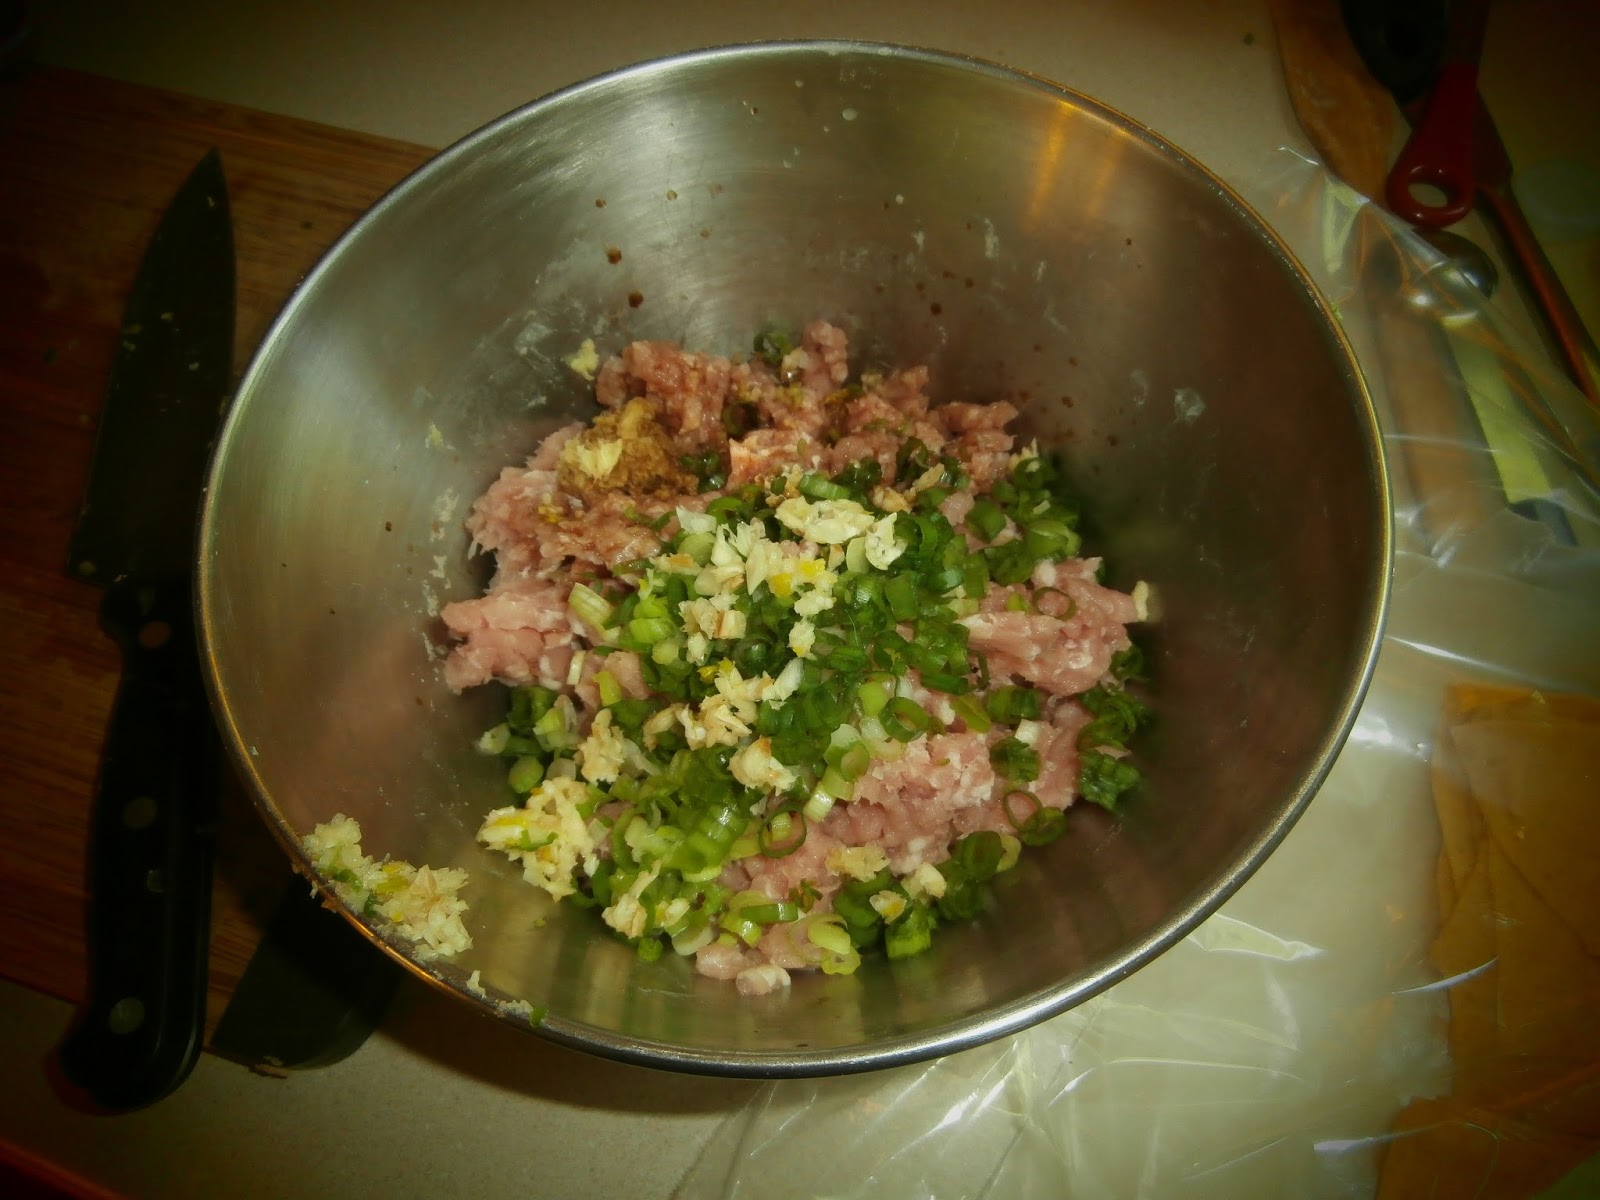
In a large bowl, add the meat, ginger, garlic, green onions, soy sauce, and cornstarch and mix well to combine.

Squeeze excess water out of the cabbage and add it to the meat mixture; mix well.

To assemble the wontons, place a wonton wrapper flat in the palm of your hand. If frying, add 1 teaspoon of mixture to the center of the wrapper.

  Dip a finger into water, and paint all 4 edges with the water. Fold the wonton in half, corner to opposite corner to make a triangle. Seal tightly all around. Make sure there are no air pockets or holes in the wonton. Fold the longer two triangle points together and seal to make the wonton shape.

 To fry wontons, add 1 to 1 1/2 inches of cooking oil to a wok or pot. Heat the oil until it reaches 375F. Add a few wontons to the oil to fry, turning occasionally until they are golden brown. Remove them to a draining rack placed over a baking sheet so they can drain excess oil.


Chopped Cabbage, Sprinkled With Salt.


Meat Filling

Linking to the HOST