Tuesday, March 16, 2021

"If You're Happy And You Know It!"


This is a homeschooling idea for preschoolers and kindergartners. I like to sing, "If You're Happy And You Know It," with my little ones when we start our school day. Doing all the motions with them helps them to get all their wiggles out and puts everyone in a good mood. I think our favorite verse is, "Roar out loud!" We have a lot of fun with that! 


We have a Scholastic book with a version of "If You're Happy And You Know It," illustrated by Jane Cabrera. I love Jane Cabrera's illustrations! I grew up with her, "Over In The Meadow," book. It is one of my Mom's favorites. :)


This is the version that we do:

If you're happy and you know it.........

1. Clap your hands,...

2. Stamp your feet,...

3. Nod your head,...

4. Roar our loud,....

5. Spin around,....

6. Go kiss kiss,...

7. Flap your arms,...

8. Say squeak squeak,...

9. Jump around,...


Do you have a favorite verse? What variation do you sing? Let me know in the comments section! 


Proverbs 17:22 

A merry heart doeth good like a medicine: but a broken spirit drieth the bones.


Tuesday, March 9, 2021

Teriyaki Marinade And Teriyaki Chicken Recipe


This Teriyaki Marinade is great for flavoring all sorts of meat, especially for grilling, and vegetables for shish kabobs. I also use this recipe to make a sauce for stir fry sometimes.

Teriyaki Marinade

1/2 cup brown sugar

2/3 cup ketchup

2/3 cup vinegar

1/2 cup soy sauce

1/2 cup vegetable oil

5-6 cloves garlic, crushed and minced

2 tsp. ground ginger

Combine ingredients and soak meat and or vegetables overnight. 


Stir Fry Sauce Variation

Cut recipe in half

Omit oil.

Add 1 TBS. corn starch.

When stir fry is almost done pour in sauce and cook 1 minute, until thickened.


Baked Teriyaki Chicken Recipe

1 recipe of Teriyaki Marinade

6-8 lbs. Chicken Legs and/or Thighs

Remove skins from chicken pieces. Soak chicken in marinade for a few hours.

Place chicken onto a sheet pan and bake at 400° F. for 20 minutes.

Pull the chicken out of the oven and dunk each piece into the marinade. Place back onto the sheet pan turning each piece so that the side that had been facing down is now facing up.

Return chicken to the oven and bake 20 minutes longer. 

Add 2 tsp. or 1 TBS. of corn starch, depending upon how much marinade is remaining, to the leftover marinade and boil for 1 minute if you would like a sauce.

Tuesday, March 2, 2021

Dutch Baby Recipe!


This recipe has been a challenge for me to master. The first Dutch Baby that I made puffed up beautifully! It was followed by flat one after flat one. Dutch Babies are also known as German Pancakes, just for future reference.

Flat Dutch Baby, again. :(

I read an article called Why Didn't My Dutch Baby Puff Up? I implemented the techniques from the article. My resulting Dutch Babies were still flat as a pancake, not the kind of pancake I was aiming for. :)

I watched a bunch of YouTube videos on how to make a Dutch Baby. I gleaned a few new pointers. I tried adding these pointers to my recipe and voilá! A perfectly puffed Dutch Baby!

And then another one!

This is how I get consistent results. The method is specific, but it works.

Dutch Baby Recipe

3 TBS. clarified butter or clarify your own butter*
3 eggs at room temperature**
3/4 cup milk at room temperature**
3/4 cup flour 
1 TBS. sugar
2 tsp. vanilla flavoring
Pinch of salt
Confectioners sugar for dusting (optional)

Preheat oven to 400° F. While the oven is preheating place a 10 inch iron skillet into the oven. Heat the skillet for no less than 15 minutes.

In the meantime, combine the room temperature eggs and milk in a mixing bowl. Whisk until mixture is light yellow and no longer stringy, about 1 minute. Add flour, sugar, vanilla, and salt, whisk vigorously to remove lumps and incorporate air, about 1 minute. Set aside batter and let rest for 10 minutes.

At this point you can clarify your butter if you don't already have some.


*To clarify butter: melt the butter in a heat proof container in the microwave or in a sauce pan on the stove. 
Skim the foam from the top of the melted butter and discard.
Gently, dip the butter oil out with a spoon, avoiding any milk settled at the bottom of the vessel.


Carefully remove the hot skillet from the oven. Pour 3 TBS. butter oil into the hot skillet. Give the batter one last quick whisk. Pour batter into hot skillet. Swiftly return the skillet to the oven. Cook the Dutch Baby 20-25 minutes, until puffed and golden brown around the edges.


Remove from oven. Using a spatula transfer the entire Dutch Baby from the skillet to a cooling rack for a few minutes to allow the steam to escape without condensing along the bottom and rendering the Dutch Baby soggy. Dust with confectioners sugar when slightly cooled. Slice into wedges and serve. 


**For room temperature eggs I leave them out of the refrigerator overnight. And for room temperature milk I heat it ever so slightly on the stove.


Tuesday, February 23, 2021

Book Report: Our Nig Or Sketches From The Life Of A Free Black by Harriet E. Wilson


 I read this short little book a couple of weeks ago. It was a very sad story. I tend to steer clear of sad stories. But, every once in a while I think I could reap some benefits from reading a true story even though it can be depressing. People really have suffered and are still suffering today. Reading a true account of a mistreated individual can help me to be empathetic and also keep me from getting an unrealistic view that all is sunshine and roses. Of course, it is not good to dwell on these things all of the time. 


Our Nig by Harriet E. Wilson is an autobiography told in the form of a novel. This book was originally published in 1859. My copy is a reprint with the font and typeset true to the original style. 

Harriet Wilson uses the name Frado for the character in the story who represents herself. Frado was abandoned by her mother as a small child. She was left at a neighbors house and her mother never came back. These neighbors took Harriet in as a slave. The family lived in the North but that didn't keep them above treating a human as an animal. Neither did being in the North make Frado free. 

Some of the family members were friendly to Frado. (I use that word lightly. Harriet portrays these family members as friendly, but anyone who can stand by when another person is being abused is not "friendly" in my book.) The family members with the most influence and power were very wicked. They beat and severely mistreated her. 
Thankfully, one of the characters takes the time to share the gospel with Frado. Frado feels the need for a Saviour. She finds it hard to believe that Heaven can be for blacks. Her master thinks that blacks have no soul and that they are no better than animals. Having these lies pushed at her makes it hard for Frado to believe the truth. In the end she is able to speak with a minister who assures her that the gospel is for all races. Frado clings to comfort she finds in the scriptures through her hardships. 

Once she was finally able to leave the oppressive family her health was so broken by the years of abuse that she was unable to support herself. She suffered with poor health for the rest of her life.

Our Nig does not have a happy ending nor can it. At the time it was written slavery was still an institution sanctioned and protected by law. Blacks did not have equal rights, not even in the North. And, just because a household was abolitionist politically didn't mean they would welcome a black person to stay under the same roof as themselves. In many peoples minds black individuals were thought of as second class citizens.
 
Times were bleak for our darker colored brethren during those times. Reading accounts like Our Nig can be depressing. I am glad that we live at a time in our country when the law grants and protects every citizens rights, regardless of race.

Acts 17:26 +27
And hath made of one blood all nations of men for to dwell on all the face of the earth, and hath determined the times before appointed, and the bounds of their habitation; That they should seek the Lord, if haply they might feel after him, and find him, though he be not far from every one of us:

Tuesday, February 16, 2021

Did You Know, Whales Need Fresh Water?


I was surprised to learn that whales can not drink ocean water. What do they do? Drink rain water?

The answer: Whales receive all their hydration through the sea creatures they eat. If they don't eat they will die from thirst before they die from hunger. 


Isn't that a fun little fact? 

I learned it in this video about a Pilot Whale rescue. This story is pretty fascinating! I hope you enjoy watching it, too!

https://youtu.be/wXZio54CSbI


This Pilot Whale became lost close to shore. A research team was sent to investigate. They had to give the whale water because it was severely dehydrated. They tried several times to lead it out to the open ocean, but everytime it came back to the shore area. After some testing the researchers concluded that the whale had a problem with it's sonar system and was unable to locate any prey. Without being able to eat the whale would eventually die. Fortunately, for the whale, Sea World in California was able, and willing to transport the suffering whale to their location. They put this whale on an airplane and flew it to California! Can you believe that? Anyway, that is where the poor Pilot Whale was able to live out his days. He died in 2012.

Genesis 1:21 

 And God created great whales, and every living creature that moveth, which the waters brought forth abundantly, after their kind, and every winged fowl after his kind: and God saw that it was good.

Further reading:

https://www.nature.com/news/whale dies from dehydration

https://blog.seattlepi.com/candacewhiting/2012/05/28/seaworlds-pilot-whale-sully-dies-a-story-of-successful-rescue-and-early-death/

Tuesday, February 9, 2021

Try Something New: Japanese Onigiri

Onigiri are eaten in Japan as sandwiches are eaten in The United States. They are easily portable. Onigiri are a great lunch food. 

I learned about Onigiri from the YouTube channel Emmymade. I recommend you search, "Emmymade Onigiri," on YouTube if you want to learn more about Onigiri. There are a lot of details in her videos that I found interesting. 

Onigiri is basically a seasoned rice ball, stuffed with tuna or other ingredients or left unstuffed, and wrapped in Nori (seaweed paper). I really like them. They are great and they are gluten free.

I am so happy that I tried Onigiri. They are really tasty! The seaweed wrapper, Nori, has a very unique flavor that I can't compare to anything that is in my normal American diet. I would describe Nori as tasting like the sea. Both of my boys really like it! They would eat a whole package in one sitting without adding anything if I let them. My youngest son described Nori like this, "It tastes like fish food!" (And he should know,.....) Haha!


I had to go shopping at the local Asian grocery store to buy some of the ingredients for Onigiri. 

This is the isle with Furikake seasoning.

I needed Furikake (rice seasoning). There are a lot of varieties of Furikake. I chose a Kimchi flavored Furikake. I thought is was very tasty. There was a nice kick of horseradish and flakes of Nori, plus sesame seed, anchovy, and other flavors. 


I bought a 50 lb. bag of rice at the Asian grocery store, too. The type of rice that works best for Onigiri is short grained rice, commonly called sushi rice. Short grained rice is very sticky and is sometimes called glutenous rice because it is sticky like glue, not because it contains gluten.
This is a package of small rectangle sheets
of dried seaweed. The larger squares of Nori
are the kind used for sushi. 


I also bought the Nori (seaweed wrapper) at the Asian grocery store. I have seen Nori for sale at some Walmart stores, though, so, if you don't have an Asian grocery store, you may be able to buy some Nori at Walmart. Walmart also carries sticky rice in the Asian section. I buy the Botan brand. At the Asia  grocery store they also carry Botan brown short grained rice, which is probably healthier for you. I haven't tried it yet, though.

 To make Onigiri:
1. Cook the rice according to the package directions.

2. Mix in some Furikake, if you want. This step is optional. I have made Onigiri without Furikake and it tastes fine.

3. Using wet hands, take a hand-full of rice and shape it into a ball.

4. If you are stuffing your Onigiri: Make a dimple in the center of the ball. Put a small spoonful of filling into the dimple. Roll the edges over to cover the filling. (Make sure to keep your hands wet, otherwise, this will be nearly impossible.) I have used tuna mixed with a little mayonnaise for stuffing my Onigiri. 

5. Wrap your rice ball in a sheet of Nori right before you are ready to eat. The Nori will quickly go soggy so don't do this step ahead of time. 

The pictures of Onigiri in this post show a small piece of Nori around the bottom side of the Onigiri. I was running out of Nori so I cut it into smaller pieces. I like to wrap the whole rice ball in a large sheet of Nori if I have enough to do so. But, you can wrap your Onigiri however you like! 

Have you ever tried making some food from a foreign nation? Did you like it? Let me know about your food adventures in the comments section!


Onigiri with some sad looking broccoli
 and carrots. :)


Tuesday, February 2, 2021

Pattern Review: Butterick 6483


I am excited to be writing my first ever pattern review! I have sewn several dresses using this pattern. I chose view G&H.


Did I make any changes?

I did make a few changes. 

1. I sewed the trim onto the collar differently. I did not like the way that the pattern instructions require the collar trim to be attached. 

The trim sewn according to the instructions.

It looks terrible from the underside.

I sewed the trim onto the collar seam when I assembled the collar.

This lace is sewn into the collar seam.

It is much cleaner on the underside.


2. I made the sleeve casings a little wider.


The original casings just don't fit a real baby. My babies are not even that chunky and the original sleeve casings are much too tight. I recommend adding 1 inch to the sleeve casings when you cut out the pattern. Your sleeve won't have as many gatherings, but it still has enough.

3. I did not make a placket opening in the skirt. I never like how those gape open, and I thought the bodice back opening provided enough room to put the dress over the head and get the arms in the sleeves.

I installed snaps at the back opening instead of buttons and button holes. 


4. The pattern calls for a 3 inch hem. I only did a 1 inch hem. My little girl needed the extra length.


Is the pattern easy to follow?

Yes, this pattern is easy to follow. The instructions are clear and the construction steps are in a very good order.


This pattern even directs that each seam that is going to be left exposed be finished. It doesn't just say at the end of the pattern, "Oh, by the way, all exposed seams should be finished." No, this pattern puts it right in there when the step is finished, "Now stitch again 1/4" from the seam allowance." I appreciated that.

What material did I use?

I used a few different cotton fabrics from my stash. Some of them were probably quilting cottons.

I was excited to use this vintage material for one of the dresses.
My sister gave it to me years ago.
I have been saving it for a special project.
I didn't have matching bias tape for all the collars. 


I thought it would be fun to use contrasting colors for the bias tape.


Would I recommend this pattern?
I was very happy with this pattern. I plan to use many more times. I definitely recommend it to others!

Tuesday, January 26, 2021

My Family's Favorite Pizza Crust


This dough is the no-knead artisan bread dough that was really popular about 10 years ago. It is really simple and fast to assemble. This recipe and technique has never failed me. The crust always turns out with a great yeasty flavor and aroma, along with a perfect crunchy on the outside, and chewy on the inside texture. 

Let's get started!


 Dough Recipe

3 cups warm water

1 1/2 TBS. yeast

1 1/2 TBS. course or kosher salt

6 1/2 cups unbleached flour

In a large bowl (at least 4 quarts) combine all the ingredients. Stir until a shaggy dough forms, 5 minutes is all it should take.

Shaggy dough. Stop stirring.

Cover loosely and rest at room temperature for 2-5 hours. 

After the rest you have a bowlful of sticky dough.
At this point the dough can be used for pizza or put into the refrigerator for up to 2 weeks.

Make sure you start preheating your oven well and in advance, like 30 minutes. Set your oven to 500° F. and place an overturned iron skillet on the middle rack. A stoneware pizza pan can be used instead of an iron skillet.
Preheat oven and iron skillet.

Sprinkle flour over the dough. With floured hands pinch off a lump of dough, about the size of a grapefruit. Working quickly, tuck under the raw edges and plop your lump of dough on a little pile of flour.

Lump of dough on pile of flour.

This dough is almost too wet to use a rolling pin to shape. After the dough has been refrigerated it is much easier to manage. Once the dough is chilled you can probably use a rolling pin.

 I use my hands to shape the dough (most of the time) in this manner:

Flatten the lump into a disc. Lift the dough by the edge let the weight of the disc stretch the dough. Rotate the disc so that it starts to make a circle. Lay it down on the flour frequently to solve any stickiness. Continue to stretch and manipulate the dough until you end up with the desired shape. 

It is really easy to stretch a hole in the dough, so just be warned.

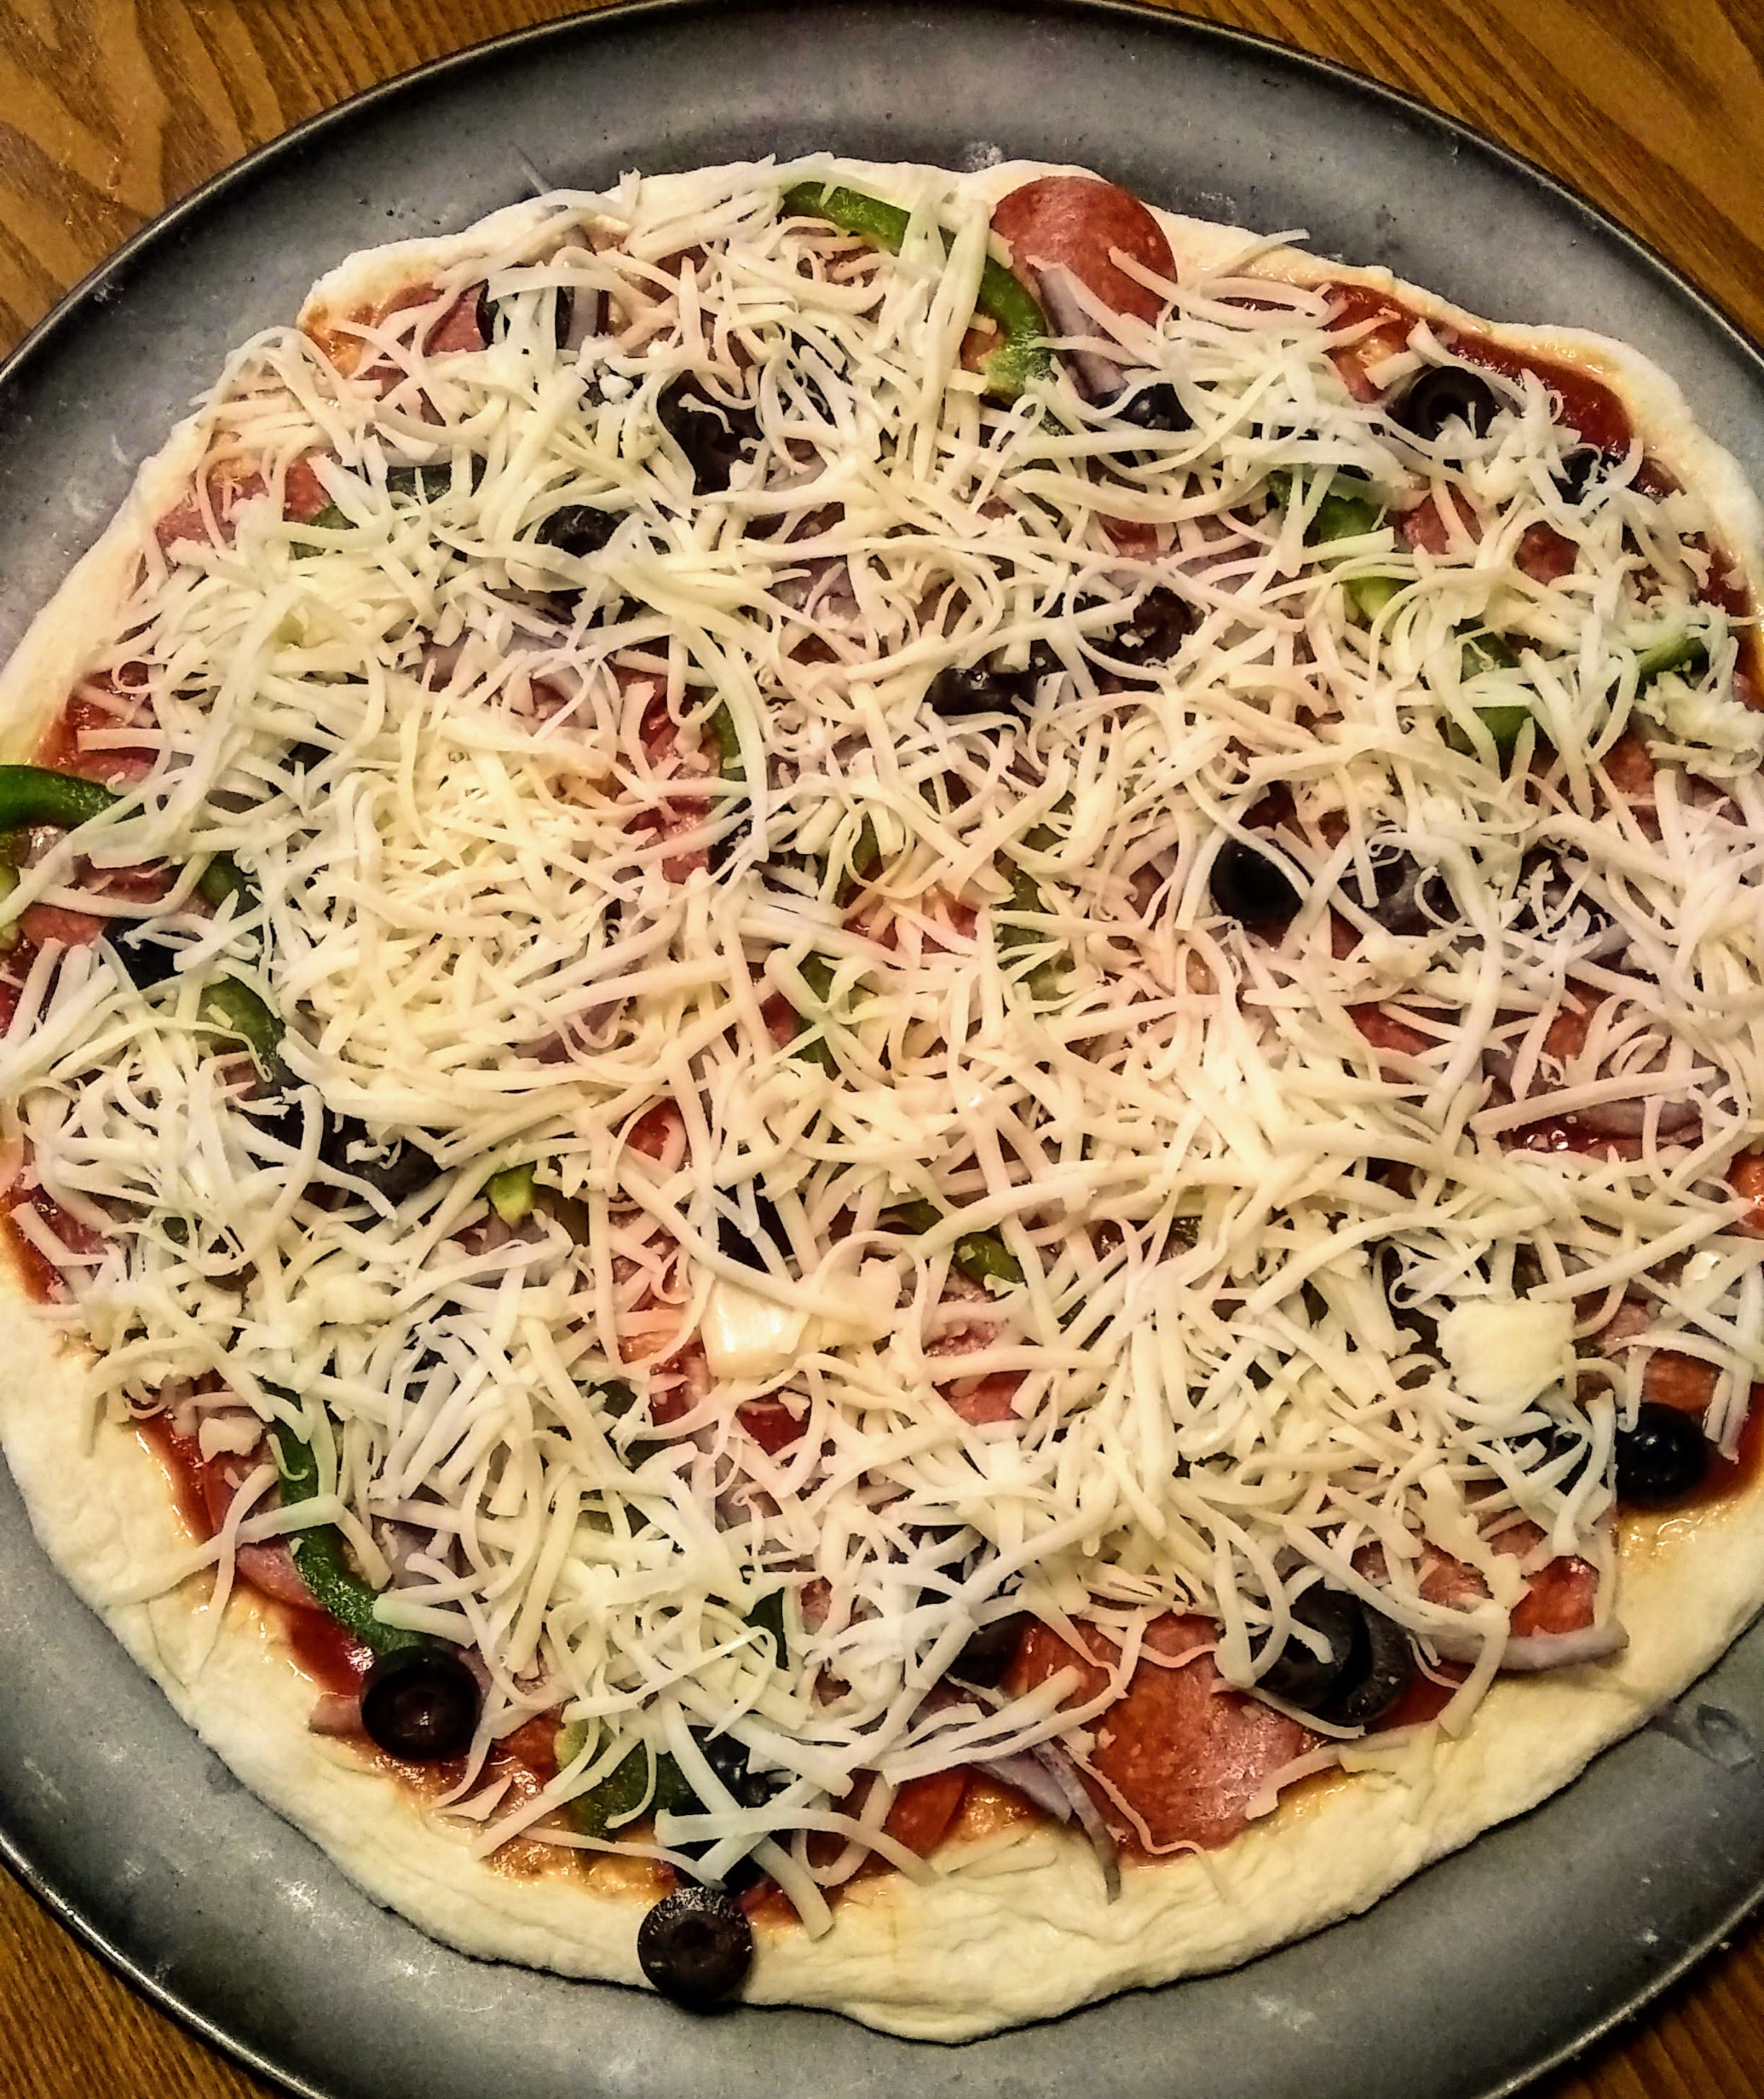
Transfer your dough to a pizza pan and add toppings.

Ready to bake!

Place your pizza pan on top of the hot upside down iron skillet in the oven. Bake 7-10 minutes.